The 62 CA95 Basket Case Rescue Log, Start Date June 1st 2024

Thanks for letting me provide encouragement, as you worked your way through a bunch of problems and issues. I give credit due for advice to this forum as a whole, because I don't have near the experience that many others here do. I spend more time reading here and learning here than commenting.

Too bad the neighbors are sad sacks and must've missed out on having Honda bike joy in their lives. A smile and invitation to come hang in the shop, maybe even learn to ride, may burn a hole in their grumpy attitude.

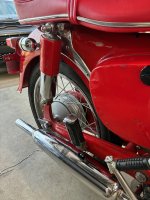
Raise the wheel off the floor and let most all the air out then use a smooth spoon handle to go around the bead to make sure the tube hasn't got stuck or pinched under the tire bead edge. Just push it in gently, then air it up. Seating a tire with the weight of the bike on it often doesn't work.
 
Too bad the neighbors are sad sacks and must've missed out on having Honda bike joy in their lives
Agreed. I enjoy the physical world much more than the virtual world. I think that's the difference between today's elders and youth. I have a neighbor who is proud of his 73 VW van. We are on the same page, We go to car shows 1st Saturday of every new month. Maybe next show the 62 goes.
I will try to seat the tires as suggested. Many thanks again!
 

Attachments

  • IMG_5301 73 VW 62 CA95.jpg
    IMG_5301 73 VW 62 CA95.jpg
    90 KB · Views: 6
That is so awesome you got her running!!!!!
Thanks! I think "we" got it running! This forum has the best advice from knowledgeable people. The flywheel fix put me across the finish line. (Credit to Tom!)
The bike has a slight cough at near full throttle. This cough is not an issue as she powers up nicely without smoke and the bike does not "smell" when parked after running.
I am working on a side project with an idea about retrofitting a modern carb on the 62. Four pics attached. 1st is a funny pic of my dog, Alex. 2nd & 3rd pics is a carb manifold from a CB160 cut and fitted to the carb mount (needed a bit of reaming to fit mounting studs) on the 62. 4th pic is the proposed carburetor to buy; I may consider other carbs to buy before "pulling the trigger". I will send out the manifold to a machinist friend to cut the manifold from oblong to round then fit a carb like the one in the pic or similar. Attaching the carb to the manifold will be a clamped boot. Figuring out a way to retrofit a new carb to the CA95's should get us CA95 owners out of the nasty loop of repair kits and trying to make good old used and expensive original carbs. I appreciate all who continue to follow my journey!
 

Attachments

  • IMG_5275 Alex Advice.jpg
    IMG_5275 Alex Advice.jpg
    65.5 KB · Views: 4
  • IMG_6165 carb project.jpg
    IMG_6165 carb project.jpg
    569.1 KB · Views: 4
  • IMG_6166 Carb Project.jpg
    IMG_6166 Carb Project.jpg
    1 MB · Views: 4
  • Proposed Carb for CA95.jpg
    Proposed Carb for CA95.jpg
    206.6 KB · Views: 4
Thanks! I think "we" got it running! This forum has the best advice from knowledgeable people. The flywheel fix put me across the finish line. (Credit to Tom!)
The bike has a slight cough at near full throttle. This cough is not an issue as she powers up nicely without smoke and the bike does not "smell" when parked after running.
I am working on a side project with an idea about retrofitting a modern carb on the 62. Four pics attached. 1st is a funny pic of my dog, Alex. 2nd & 3rd pics is a carb manifold from a CB160 cut and fitted to the carb mount (needed a bit of reaming to fit mounting studs) on the 62. 4th pic is the proposed carburetor to buy; I may consider other carbs to buy before "pulling the trigger". I will send out the manifold to a machinist friend to cut the manifold from oblong to round then fit a carb like the one in the pic or similar. Attaching the carb to the manifold will be a clamped boot. Figuring out a way to retrofit a new carb to the CA95's should get us CA95 owners out of the nasty loop of repair kits and trying to make good old used and expensive original carbs. I appreciate all who continue to follow my journey!
It's been a pleasure to be part of your team, Chip. Sometimes taking a break or another opinion or fresh eyes help the progress. I also give credit to this forum for most of the experience and knowledge I've gained in the short few years I've been tolerated here.

I can't seem to find the post from several weeks ago about adapting another carb onto a CA95 that seemed reasonable. He was building a CB95 (a bike that Honda never built), similar to the CB93, but using the CA95 frame which is pretty tight in the carb space area. I hope you have enough room to do the manifold adapter you plan.
 
I also give credit to this forum for most of the experience and knowledge I've gained....
Thanks Tom, but you arrived with knowledge too and it's been willingly shared probably just as much.
....in the short few years I've been tolerated here.
Yeah, your wordsmithing and understated wit has really been difficult to endure, so stop it already. :ROFLMAO:
 
Thanks Tom, but you arrived with knowledge too and it's been willingly shared probably just as much.
I concur. I consider my project finished and the bike now entering occasional tinker & ride. Eventually I will let her go. For me, it's the journey. I want to revisit start 6-1-24 and finish pics 8-17-2025. Note: Nothing on the bike was re-chromed, better parts were sourced. The paint (and patina) is original less the rear fender. I found near perfect rattle can match to the old, polished paint. Testors brand model enamel. Surface prep materials was all body shop quality. Lots of cleaning with both acid and caustic base chemistries. Old faded paint was brought back to life with 1500 wet sanding and applied Marine Spar Varnish thinned 50% with thinner designed for the product, wet sanded again and then polished. This is the first bike I never painted. Enjoy the pics.
 

Attachments

  • IMG_2970.JPG
    IMG_2970.JPG
    1.3 MB · Views: 7
  • IMG_2965 Start 6 1 24.jpg
    IMG_2965 Start 6 1 24.jpg
    846.2 KB · Views: 7
  • IMG_2963 Start 6 1 24.jpg
    IMG_2963 Start 6 1 24.jpg
    986 KB · Views: 7
  • 63 engine.jpg
    63 engine.jpg
    305.8 KB · Views: 7
  • As purchased ebay pic.jpg
    As purchased ebay pic.jpg
    8.2 KB · Views: 8
  • IMG_6173 Final 8 17 25.jpg
    IMG_6173 Final 8 17 25.jpg
    1.6 MB · Views: 8
  • IMG_6174 Final 8 17 25.jpg
    IMG_6174 Final 8 17 25.jpg
    1.7 MB · Views: 7
  • IMG_6187 8 17 25 Final.jpg
    IMG_6187 8 17 25 Final.jpg
    1.1 MB · Views: 8
  • IMG_6183 Final 8 17 25.jpg
    IMG_6183 Final 8 17 25.jpg
    1.6 MB · Views: 8
  • IMG_6182 Final 8 17 25.jpg
    IMG_6182 Final 8 17 25.jpg
    1.6 MB · Views: 8
  • IMG_6188 Final 8 17 25.jpg
    IMG_6188 Final 8 17 25.jpg
    1 MB · Views: 6
Appreciation of what has gone before is often more like preservation than restoration. Chip chose a challenging direction and deserves notice for saving this Dead Sea Cycle.
Good name for a shop, huh? There's enough dirt in mine to pull it off. Some of my manuals look like they're printed on papyrus.
 
I have to bounce a question. Would a bad magneto cause high end RPM cough & hesitation? The flywheel changeout made a difference. I'm pleased to no end that I can at least get some rides out of the 62, but the little scoot still has a problem after 3/4 throttle. Before the flywheel change out all I could get is 1/4 throttle, thus my magneto theory.
Hate to beat a dead horse, but I would really like a smooth throttle response top to bottom. The magneto I used came with the engine parts at the time of purchase, so another part loose since 1966. (see b4 & after pic). Might there be any way to determine if I have a dead field coil?
Thanks!
 

Attachments

  • mag close up After.JPG
    mag close up After.JPG
    1.1 MB · Views: 3
  • mag close up b4.jpg
    mag close up b4.jpg
    35.2 KB · Views: 3
Sounds like progress overall. You've gone from 1/4 to 3/4 good throttle.

If your battery stays up to 6.3-6.4 or more volts, you are good. No reason to 2nd guess the stator or rotor.

The missing top end response is most likely carb or ignition related. If you got the plugs, caps and coil as good as possible (which you just recently did) then the carb should be the last area of improvement.

I just put a larger main jet (100) in Charles late carb bike and he actually got it up to 60mph for the first time ever.
 
Ok. Thanks for your response. For the life of me I don't recall the size of the main jet. I need to check my fuel parts drawer. My suspicion about the stator comes from reading all that I can about the possibilities for top end stumble.
 
For the life of me I don't recall the size of the main jet
Today I pulled the carb to check the main jet size. Jet size is 100mm. I drilled out the main jet to 108mm.
Maybe she needed a larger main jet being bored out .75 over (3rd size over) What a difference!

Lastly, I will be on the lookout for the high-speed jets to punch out larger. Thanks again all (especially Tom!) for reminding me about the unusual and little things overlooked.
 
So far, the largest main jet I've used is 100 (largest jet listed in the parts book). 108 may be too much. Both power jets should be 130. This set up gets you 60mph.

It's running better than ever, don't change a bunch of stuff. I can look at your carb this winter and test it on my bike.
 
108 may be too much.
The better running bike is encouraging to say the least. The 62 starts instantly now. I have a 105 main jet ordered just to have in my pocket. I plan to buy a new carb and have my CB160 manifold half machined to fit the new carb bore.
I may take you up on your offer once my replacement assembly fuel delivery system is complete and installed.
I'd never rain on your inner tinker but willing to help.
 
Hey spokes very awesome progress, I was helping a friend with his ford mustang( I know its a car and a ford).
He had hesitation and stumble occasionally. It did have carb issue but what finally made it pure was the condenser. I ohmed it out passed flying colors, car had an old one in glove box( same readings) but I was done testing and replaced condenser.
Not sure if your condenser having an issue. Just don't want to lead you wrong direction
 
Not sure if your condenser having an issue
Thanks, Gman!
I gotta admit anything is possible. I'm almost there with top revs. I might just order another condenser, can't hurt. I say this as I never, but never suspected the flywheel being wrong, or just maybe the main jet being too small for a bored-out engine.

This bike, likely the last bike, has made me question myself and decades of experience. So, I'm open to any possibilities.
 
I mistakenly ordered extra condensers, so I could send you one for a back up, at least. Can't hurt trying another though. One thing at a time.
I haven't heard your's run at higher rpms in your vids. These don't have tachs but I get mine screaming. I don't know what the redline is but guess it's at least 8500 rpms. I should slap on the cheap$10 chainsaw induction tach for fun sometime.

I don't think re- jetting for an overbore is needed. At +1.00mm over that is only adding about 10cc, give or take.
 
I will take you up on the condenser. The seat goes to you after the 5th of next month. I don't have a camera to take a good vid. Perhaps if I put my phone in my top pocket and take a ride might work. I'll try that tomorrow. But in the meantime, I'm pleased with the engine so far. As far as describing revs, think 3/4 throttle chug a lug cough. Shift. Smooth to 3/4 throttle, chug a lug cough, shift. Come to think of it, the mufflers from Asia look cool, but they are straight thru without any baffles whatsoever. So, no back pressure, if that matters.
The bike starts instantly. Instant free load throttle response. If I ride the bike conservatively nice and easy she runs smooth as silk.
Oh, by the way. She has two oil leaks, not as bad as before. One leak at the bottom of the right-hand case (that's the correct gasket I replaced dry) and one 10mm stud at the bottom of the engine. I think I can fix the little stud leak. As far as the right case leak, I'm just going to live with it. Afterall It's an engine build from mixed used parts over 60 years old.

I dare not take her on a main road as she cannot get out of her own way just yet.
 
IMG_1730.jpeg
I actually found a box that fits. I did straighten the slight upper bend and it’s flat now.
Main concern on these is the lower attachment points are on the two outer case studs that don’t have much exra thread. Will probably need to remove the washer under the nut. Might almost be easier to make an 1 1/2” flat 1/8” stock bracket to mount first to the motor. Then bolt the crash bar to the bracket. I worry about the case studs being strong enough or stripping them.
My Dream had a bent case stud from a similar crash bar that got hit and bent.
Plenty of room to throw in one of the aftermarket condenser.
 
Great find for me! I always liked Crash bars on bikes. The stud mounts at the engine, if I remember correctly, mount on top of the footrest bar. If by some chance the studs are too short I will replace with longer studs. I appreciate straightening of the bars. When I'm done polishing the bars with my rouge and wheels they will shine like new and the "patina" (I just love "patina" a kind word for corrosion damage) will match the patina of the bike.

I will send out the seat next Thursday. BTW. The chrome trim is 3M Auto Trim. A great alternative to beat up original trim. IMG_6301 CA95 Early Seat.jpgIMG_6302 CA95 Early Seat.jpgIMG_6303 CA95 Early Seat.jpg
 
Ok, here is a running video showing hesitation when throttling up. Remember engine is running better than ever. Just one (or) more thing to address to get her to scream RPM's!
 
Great find for me! I always liked Crash bars on bikes. The stud mounts at the engine, if I remember correctly, mount on top of the footrest bar. If by some chance the studs are too short I will replace with longer studs. I appreciate straightening of the bars. When I'm done polishing the bars with my rouge and wheels they will shine like new and the "patina" (I just love "patina" a kind word for corrosion damage) will match the patina of the bike.

I will send out the seat next Thursday. BTW. The chrome trim is 3M Auto Trim. A great alternative to beat up original trim. View attachment 48798View attachment 48799View attachment 48800
Real nice work on the seat Chip. More inspiration to get going on my 3rd project Benly.

No, the bars mount on the most forward outer case studs. It would be better if they could mount to the footpeg studs, but would need some extra extended bracket straps to do that.
 
Ok, here is a running video showing hesitation when throttling up. Remember engine is running better than ever. Just one (or) more thing to address to get her to scream RPM's!
I hear what you mean. Poops out at 2/3 or 3/4 throttle.

I would stick a stainless steel potscrubber up each muffler. Just squeeze them into a hotdog shape and push them in with a stick. Works great and they are cheap and easy to remove if you want.
 
I'll try the pot scrubber idea. I found nicer mufflers for an earlier bike I finished back 2013 while living in Sylvania, GA. I may replace the "cool" mufflers if I find originals. I don't have much hope regarding finding flat original style mufflers for less than an arm & leg. JPEG Date Incorrect. Changed for a calendar I created for 2018.8 August 2018 Honda CA95.jpg
I had a crash bar similar to the ones you pictured. That's the reason for the assumption of foot peg mounting. I'm pretty sure about the mount.
If for some reason I'm wrong, I will fabricate mounts at the foot pegs.
 
Last edited:
I'll try the pot scrubber idea. I found nicer mufflers for an earlier bike I finished back 2013 while living in Sylvania, GA. I may replace the "cool" mufflers if I find originals. I don't have much hope regarding finding flat original style mufflers for less than an arm & leg. JPEG Date Incorrect. Changed for a calendar I created for 2018.View attachment 48804
I had a crash bar similar to the ones you pictured. That's the reason for the assumption of foot peg mounting. I'm pretty sure about the mount.
If for some reason I'm wrong, I will fabricate mounts at the foot pegs.
Potscrubbers will give some needed backpressure. It may solve your high rev issues. Stick em in and test ride.

I hate the case stud mount thing. It's just asking for trouble. I like your footpeg mount idea and would do that for sure, if it was mine.
 
Just a log update. I'm fascinated about fuel. Today, I received my 105 main jet. Yes, it is larger than the 100 but smaller than my 108 drilled out jet. Anyway, it's a nice cool day and I needed something to keep myself occupied.
I'm amazed by the corrosion found on my fuel inlet after only 5 weeks after cleaning. As all who follow my journey know, I've been fussing with the 62 trying to get it to run perfect. I'm close but not there yet.
The corrosion perplexes me. I have drained the tank and carb several times over during the summer. Never replacing the drained fuel and always added fresh. so today I take apart the carb to install the 105 jet and find white corrosion as pictured. All internal threads fittings had the same white junk. Regrets for the blurry 8-27-25 pic.
Amazing.
 

Attachments

  • IMG_5917 Fuel Inlet 7 23 25.jpg
    IMG_5917 Fuel Inlet 7 23 25.jpg
    694.2 KB · Views: 5
  • IMG_6331 Fuel Inlet 8-27-25.jpg
    IMG_6331 Fuel Inlet 8-27-25.jpg
    252.9 KB · Views: 5
I think it's water mixing with gas that makes that hard to clean nasty white stuff.
I had to review my chemistry. Yes, it's water. Ethanol is hydroscopic. Water is slightly acidic and acts like an electrolyte, precipitates and plates calcium to aluminum. (everything has some kind of - and/or + electrical charge). 10% Ethanol in fuel attracts humidity and retains a % of water. Here in Kentucky, we have had the wettest spring and a summer of high heat and humidity. I never thought about humidity and fuel until today. I guess it does not matter if you're burning fuel routinely in your car. But when the fuel sits a while is when you get into trouble.
Bottom line to remember not to use Ethanol spiked fuel in our older non-daily rider motorcycles. Yes, I've heard that more than once. I always thought seal damage, but not the hydroscopic tendencies of blended fuel. Gotta drain my gas tank, dry it out and refill with ethanol free fuel. One possible theory as to why I can't get full revs.
Just realize that instead of holding the water in suspension (e10) that it settles to the bottom of the tank (pure gas). There is a reason we all used to put heet in the fuel - basically creating our own ethanol to "dry" the gas. It never really dried anything, it just allowed the water to be held in suspension. Best bet is to just try to keep tank as full as possible to reduce the amount of air/moisture available easily.
 
Best bet is to just try to keep tank as full as possible to reduce the amount of air/moisture available easily.
Good point. All summer long I hesitated to fill the tank fearing the need for repeated drain, refill and leaks. I'm nervous about fuel issues in an attached garage. I'm making a wild assumption moisture suspended in the fuel may contribute to poor engine performance and calcium build up in an old carburetor. Absolutely agree without Ethanol water settles in the bottom of the tank. Water in the bottom of a motorcycle fuel tank is easily solved by draining. Water in the bottom of a car gas tank can be a pistol to drain and damaging to electric fuel pumps. (I don't want to open a can of worms about fuel and storage) It's just my thinking.
Tank to be pulled one last time, (I hope) dried out and refilled with 100% gasolene with a dose of fuel preservative. Then another test ride.
 
Last edited:
Then another test ride.
Drained old fuel. The old fuel is maybe six weeks old. The garage during July topped 90F many days, even when I had the garage door open. Often times I had to give up working on the bike due to perspiration dripping onto and into my glasses. I state my case to justify the dark color fuel on the right to the fresh fuel on the left.
So, did it make the engine run better? A little, now when I try get to full throttle, instead of just coughing I'm getting "cough/ jerking". So, I'm getting close. Smooth at 1/2 throttle though the gears.
 

Attachments

  • IMG_6332 old fuel new fuel.jpg
    IMG_6332 old fuel new fuel.jpg
    462.7 KB · Views: 2
That isn't an ethanol issue. Your tank is full of rust. Ethanol over saturation looks like mayo
 
If it were me. Remove and drain tank. Remove petcock. Put some sand in the tank - not a ton and play marracca with it for a while to get all the loose stuff out. Then tape off the petcock hole with some flex seal and dump in some commercial rust remover - let that sit for a few days, shake it around carefully when you are bored. Dump it out and then seal off the gas cap area and do the same thing filling from the petcock hole.
This is how I deal with all the rusty tanks that my projects have. I take the additional step of sandblasting and/or small wire cup brush in non split tanks like my FZ750
 
The inside of the tank is shiny and clean. Next time when I dump and dry out the tank (never thought to do this this morning) I will snake in my scope and take some pictures. Honestly, the tank is perfect. No sign of any rust or grit in the fuel petcock screen.
When I pulled the carb yesterday, no sign of rust or grit in the bowl. When I drained the tank, no sign of rust or grit.
Thanks for your response!
 
So, when I say the gas tank is shiny as new inside and the original fuel petcock looks like "new old stock" I can't believe what I see! No horrid smell to boot! Tank bottom perfect. I wonder if this bike and its parts was somehow kept indoors in a heated building? Can't imagine 58 years
Just to ease my mind about rust. Above quote from post #13 my amazement at how clean the inside of this tank is.
Today, using a high-power flashlight and keeping a safe distance, I took a couple of pics of the bottom right side, through the fresh fuel as best as I could. I consider the tank to be pretty clean for the age of 63 years and in storage of some kind for 59 years. The original petcock interior surface was like new as well.

Thanks again oldjeep for your suggestion.
 

Attachments

  • IMG_6336 clean tank.jpg
    IMG_6336 clean tank.jpg
    240.4 KB · Views: 3
  • IMG_6334 clean tank.jpg
    IMG_6334 clean tank.jpg
    588.7 KB · Views: 3
  • IMG_6336 clean tank.jpg
    IMG_6336 clean tank.jpg
    240.4 KB · Views: 3
Weird. Never seen fuel go brown from water. Good luck with figuring it out.
 
Of all of the bikes, cars, boat and small engines I've worked on, plus dozens of projects throughout my career, this one final CA95 project has been the most aggravating.
The 62 has made me question my own capabilities.
I can't answer why the flywheel made a difference, how fuel went brown (btw no additives by my hand), why the tires did not seat completely even on clean rims.
It's like I ran a marathon and just before the finish line someone slipped lead into my shoes.
I will get to the bottom of why I can't get this engine to get up and go. Maybe the bike is haunted and just wants to be taken apart and put back on the pallet. (humor)
 
I found one more clue that made a huge difference when corrected. Two pics attached. The points were sloppy back and forth. When examined the contact surface was on the edge. I think a washer was missing at the post. That's how the points came to me when purchased. I happened to have a small washer to fit. Almost full throttle now. I think when I reset the point gap I should be good to go.

Two good hits today. Fresh fuel & aligning the points with a washer that "should have been there". phew...
 

Attachments

  • IMG_6338 point mount no washer.jpg
    IMG_6338 point mount no washer.jpg
    716.5 KB · Views: 7
  • IMG_6339 points with washer.jpg
    IMG_6339 points with washer.jpg
    998.8 KB · Views: 7
Excellent job finding these two issues with a second look.
That is great you found that with points, I was leaning towards condenser but points not hitting correctly with vibrations that could cause all sorts of issues and definitely not something that most people would look at or catch(missing washer on points)
Makes ya think how easy next rebuild will be with all this knowledge
Yep, great job. I've heard it called point float from bad spring.
 
Thanks for such fine compliments. I'm not sure about a next build, but the knowledge remains with this forum and its members. I've very pleased with the revs now, but I still have a cough near high revs.
So today, with such a small detail like a tiny washer making a difference I had a brain cramp. What about the points base plate? Well, I'll be darned.
According to the CMSL blow ups when searching "CA95 Breaker Plates" I find two different Breaker Base Plates.
CA95E-010001 to CA95E-2100347
CA95E-2100348 to CA95E-5019831-The visual difference between the two plates that I can see in the blowup is a wider open timing "moon" and two notches and mounting screw location.
Now here's the catch! I'm using the original base plate as found with the bike. Original engine# 95E-21004152. The original plate is the early plate.
So, the early plate to be replaced after engine #CA95E-2100347 is found on my original engine (now I wonder if the side cover found with this bike is actually the cover for the engine parts it came with) is found on engine CA95E-21004152.
Today I ordered the later model base plate.
I'm getting closer to that haystack needle.
 
I don't think you have the very early 2 bearing crank motor (1959-1961), you have the 3 crank bearing 1962 onward..
My Honda parts catalogue lists only one points plate 30201-003-004. You should have that later plate. Your motor number is of the later type. There were so many minor changes at different times, there is no early vs. later simple division, but motors have been the same since about late in 1961.
We can share pics of plates, if you think you have the wrong one.
 
I don't think you have the very early 2 bearing crank motor (1959-1961), you have the 3 crank bearing 1962 onward..
True.
There were so many minor changes at different times, there is no early vs. later simple division, but motors have been the same since about late in 1961.
I agree wholeheartedly. I reacted and ordered the "later" points base plate, based on CMSNL Parts List for the CA95. Here are two shots of what I have now, and the part I ordered. I've taken another fun video of my engine running while looking directly at the points and try to get it uploaded soon. I'm beginning to enjoy this challenge and appreciate feedback from you and members of this forum. In the end I may have to order a VHT decal for my fender or side cover...IMG_6348 Current points plate.jpgIMG_6349 later year points plate.jpg
 
Here is the clip I was referring to watching the points in action while the 62 is running.
Enjoy!
 
They look the same to me, except for the adjustment notches on left edge.

The last two big improvements did not involve parts swapping, just attention to details. Well done.
 
I will report out any change in performance when I get the part and install it. Even if there is no change, the adjustment notches will be handy for fine tuning.
Also, after the 5th of next month your seat gets shipped out and I have my sights set on a new carburetor. The new carburetor will be sent to a machinist friend, along with my CB160 carb "stub" to machine fit both "stub" and new carb together. The new carb set up could be revolutionary or a stumble face down.
All in all, believe it or not, I'm enjoying this mystery challenge. I also really appreciate this forum; it's member feedback and your insights.
 
I hate to upset the improved points adjustment, but the center of the rotor bolt seems to wobble more than I'd expect. Either the bolt is bent or malformed or the advance is not seated against the rotor face on it's indent.
Maybe it's just me and my eyeballs are wobbling. I'm watching the little dimple in the center of the bolt head.
Do you have another bolt to try?
 
Back
Top Bottom