1963 CA95 Restoration

nabs

Veteran Member
Joined
Jun 4, 2020
Total Posts
269
Total likes
43
Location
Hertfordshire, UK
This project began in March 2020 and I'm copying the original posts into this thread. I now regret having wittered on so much in the original thread, but I plan to carry on copy and pasting until I catch up where I am now. Here goes!


Here is my 1963 CA95 - I’m based in the UK and this bike apparently originated in Minnesota, although it came without any paperwork.


dH19foDakxkx7ibd6

ACtC-3dVr4lz9v3ZBCGrTO_2ZEMoQvkzKDqLNipfvPNaYf30MO_nJxG-Nz4d9fDxQNUPJJFgSJ5t8WwTqP_SafEymnIFMl2MoCK7t4ba1f8PdBU33reedR-N5oCFgLN_gfYPLp27JFjOeHbFCNW6gYp0crcP5Q=w1910-h1432-no


The odometer shows ~5000 miles, although of course I can’t be sure this is accurate. Mind you I am pretty sure it has not run for a long time!


ACtC-3fTME-qen6ybZYIDTzrnx3UQ1d0n4kN4Dc5yth_89zfQtg1WPOTIwkjwy37_63gWiwcVqcupCJVN-CHSpvYo9ccInp-CZLq9sP9ndsjRep2sib7czVprPH_3Bd3m5l-TIiFzO09EgyPj2UkFKQRTVTXDg=w1910-h1432-no


urgh:


ACtC-3eB4nbJYueJsLhgARkC-O0m1UpjO8MqzZyiEiMPDnfvL9DBinoTK5ssQC5zRB_2caiiKZKi55E-rttxrC3zhks14NslHCkEtAw0kZrhNKyWG0yTOixBkpImF6m3ikNzhYpdSda4N9htTs7TAXUqHic5rg=w1910-h1432-no


The engine is seized, the clutch is not working and there is no resistance on the kickstart, but cosmetically - bar the broken front mud guard and a few bumps and dings - it is in excellent condition, remarkable really considering its age.


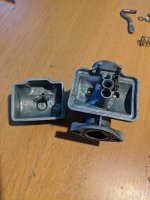
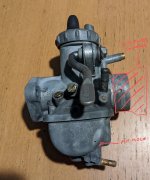
It seems to have been partially dismantled and then hastily put back together again (there are a number of missing bolts and nuts, and others are loosely done up. There are a few bits missing - the small carb/air cleaner covers, throttle tube, tank badge and some bits of the carb. I do have the side panels, I just took them off before this picture was taken


My theory is that it broke down after a few years of ownership and then was left somewhere dry until it was bought by someone intending to do it up who - after starting to dismantle it - had second thoughts and sold it.


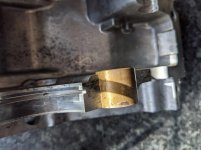
I was hoping they were did not get as far as taking the engine apart, so my heart sank slightly when i found this under the fuel tank:


ACtC-3c_Wpzdshe1IvVu6kYRlpzk5bZn1DM3UDVIEFQfkRi3J2oQTq8KRiHrC9rMK_Q-1ZR9B8E-BXAte6iv98az4VWC4R2GpSdr9ConfnLlwkcdkbuVjPoiJ131Xh28llBWFbILRQTA9zNpXlBRxnthBlKX-g=w1910-h1432-no


… but on closer inspection all the valves are all present and correct, and although the right hand side engine cover has a couple of mangled screws, the other side and the top end show no sign of being removed previously - so fingers crossed the problem with the engine that caused it to be stored in the first place are not too serious.


That is what I've found so far, and overall I am very pleased with it. These bikes are quite unusual in the UK (I've never even seen an example of UK equivalent model, the C95), so I'd love to hear your opinions.


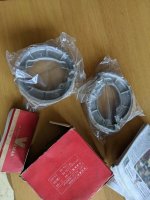
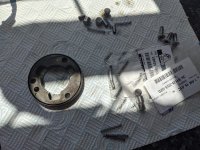
What I am thinking of doing was to replace the missing parts, do the mechanical repairs plus new cables, tires etc, but - other than giving it a good clean - I was planning leaving it pretty much as it is. What do you think?
 
I have cleaned up the carb, although to be honest it is barely salvageable. Problem number one was to remove the throttle slide, which was jammed in very tight by the grime:


ACtC-3c8cjabbYCTgUPKV2A_be2WfH9JoFLS6Zml2Hh8I3mHlMDityeZgi1Yz34vLPGuIr3d-NfNnBQtUcYdTSc24G9MFnTV32YyCvHYnyKNbFiWE1A_Ed1aeKum3_gXa9GgOLJO3e5TNvhRxNz2FlzZvNVKKw=w1088-h1431-no


ACtC-3dPOFCSRno_DnSU21kvzrMjTubrwrXZ8JzvD6nc9B_BiLtALQFOYgeDYW1XZGrq_n6FS7bjAtwVBpa665QxZdpnVOTUadj4R5Xf1XtTxV9cajeJr8PB_DF9uNYg-gPby74jdTC5y0VFzQLoD9AKeuzn4A=w1400-h1050-no


It took a while but by carefully edging the slide up and down I was eventually able to extract it. It was so tight that I was worried the chamber might have warped, but after a thorough clean it now moves freely. The slide is a is very tight and even the slightest imperfection causes it to stick in the chamber, I used a little bit of metal polish on the chamber and it now moves up and down under its own weight.


The inside of the fuel chamber was very badly corroded and I eventually abandoned mechanical cleaning and resorted to citric acid - it is now clean but there is a lot of deep pitting and a small pin hole has opened up in the bowl. Not ideal, but I think it should still work if I can fill the hole with JB weld (well it needs to work, as I don’t have another carb!):

ACtC-3dLtksTM67x9GcCb4KIsKiYS3eWVbmy_o350pn7rhSsWsQilYYOPnJ6dOfnyrQ04-56_TNY6w5TEbQuo9Pe4QJ0DR9Y-l39hzaM3wk7TK4ttEEQzMT1k7ZZzXyyUOVd8mPr_gV5HpKqZ_PZ7Kg5_6duEA=w1074-h1432-no


More on the carb repairs in the next post!
 

Attachments

  • clean.jpg
    clean.jpg
    213.1 KB · Views: 7
here is a bit more info on the repairs

ACtC-3cRq009dUfMFCjfdkeoew4H_ge5ntSgbtqR9GqZwS65cxeoGkfFvPheSrSbeX9Yphoz5dT4HzqlpnZqmAKPUpHNFUHF57elpZb24nb8YEnmRdOXUjU3g_rLT-bZvvU4MMpIrnbccoVV93x40oiuhcGC_A=w1910-h1432-no


I bought what I believe is the closest matching keyster kit, and although all the parts seem well made, not many of the parts are a good fit for the model of carb that I have:


ACtC-3f_O8YpnmpG1L2aosGttt-ij6YLPKUjROCLEtAmMBIF9OxqyTcIhDPm9qqSDG9bFv5aDSQgoeAE6rKmuJAI1RB23Itd4XesPEIE7tXkTaY7id4DGYIr9XIbMl1oW81zT-hq4L1XAQk4FSjV0nbd81Lnhw=w1910-h1432-no

AF1QipMQxqzRQgXBGPIYt9vrqEgdU5Y-9GY144f5F_87


AF1QipMQxqzRQgXBGPIYt9vrqEgdU5Y-9GY144f5F_87

The float valve and float valve seat are good as is the manifold o-ring, but the gaskets are a poor fit and have to be cut down to fit.


The throttle stop screw fits - and I used it since mine was missing - as does the air adjuster screw (although the o-ring is not included in the kit). I used the air screw also as the tip on mine was pitted with corrosion.


My carb has 180 and 130 “power jets”, neither of which are in the kit. There is a 95 main and 35 slow jet included. The stamp on my main jet is not very clear, but I think it says 90 and there is a 35 slow jet installed.


I suspect no one has tried to clean the carb before so all the jets were in good shape, although the slow jet was so badly seized I damaged the head when removing it. I’ve used the kit version for now - I don’t have any tools for measuring the jet orifice to see if it really is the same as the original, but the holes on the emulsion tube are obviously smaller, so I will keep an eye out for an original Keihin replacement.


The jet needle is not the same as the original (too narrow) and no matching needle jet is supplied so this part is not much use. Luckily the original parts show no sign of wear and I have reused them.


Although tarnished, the float looks in good shape with no holes, as do the copper pipes for the overflow and power jet.


There are a few missing parts: the “u” clip that holds the float bowl in place, the small capping screw on the power jet, and conical tube that fits on the end of the carb and connects to the air filter tube.
ACtC-3f-sydNWxSQk8MJUVMy_Vphi7oP-slR1ai3fpjoQPM7Qjqu0-4Uza5IGlejpNXBNMbh1CtObKuTciFZAkw2hX-fmCpfJ1RUP3ILdGryzuSUczokDTNzRSonHyF1KsYi-2jfUxkDgUJFw_v8bT2GDickPw=w1198-h1432-no


ACtC-3cEZ6WGTEfdLqLS9Go9efmgn8ptAdwYLtXwj0H86_vyRHOjAEZSjm8PNNJcpFUF2OVxrL6Lt23SlvLzBWAvaBV1LF4Fo4H0kpXLLijvl5e_OWAYLevnmmDQ31iHnImzma3DB5e3SasuHZ-O5IRa7a5rWg=w1080-h1432-no


Luckily CMS still sells the clip and capping screw. Finally, I have ordered an exhaust reducer that I hope I can cut down to fit to replace the connector:

ACtC-3e10kgylAYGfq9k1s360yGnZupdK73BKESzKdG5z6HKdWqNVTyd0N9qsU1oYVvN6wNtqL6_srMcA7mRRn57AMbqmZLTb-J59ed26f-dGusJlPFTdl0neVm5ruMwvE7VnEgIZEJGcZfDyni9OrJWHOyvwg=s500-no


I filled the pin hole with JB weld, spreading a thin layer slightly outside the hole on both sides, which I hope will reduce the chance of it vibrating loose.


ACtC-3di3yds7_FQu1wGrTd1yRCeQtu7_5RrpNVg1jAmE1UC0AGWPE8RFenHgOG-jjN-lf-DomtnFcrcuhn93a2ADq-Z5bbE9iXWe2rD2ygINhe8C89f-vsVjPxziDxMPk8l-e6CBfBngR9u1F0QFwIjaRTzpg=w1440-h1432-no


So that is the carb more or less done: although it is a bit rough I can’t see any reason why it won’t work. We will find out if I am right eventually!
 

Attachments

  • download (2).jpg
    download (2).jpg
    234.8 KB · Views: 8
do have a question on float height - when I hold the carb so the tab on the float is just touching the pin on the float valve, the distance between the top of the float and the top of the main jet is 5mm. The manual suggests it should be 7-8mm. I haven't messed with the tab since I am assuming it is still set the same as when it left the factory.


ACtC-3dyKhcAmUxUzBGzpmqYu4QV2Zqoyq7E5DeOiNs1bdnO90tlpvoOTug_iRwHXMI9F8TcQde5XzjBqYf8DIEwF5oloBYvDYV3J3vnWQA07AUxN-r7gkrAr3tZzK0OMdVlbyR_AZ-FrCyByv-j2vixU9jS7g=w1194-h1432-no


Perhaps I have misunderstood the instructions for measuring the height - please can someone enlighten me?


---
Sounds like you are measuring correctly. I think it unlikely that a bike of that age has never had the float adjusted, not necessarily by someone who knew what he was doing.


The jets themselves are often not the problem, rather the passages in the carb body get clogged and must be cleaned out. Soaking the carb bodies in solvent or using an ultrasonic cleaner can clean them out. A source of compressed air is quite valuable in the carb cleaning business.


JT
 
thanks - I'll adjust the float height later. I've started to take the engine apart.

the generator side looks okay, albeit in need of a clean:


ACtC-3eoc5wJcJ33Xyuc4joIhKLjc7fXcEtgm8_rW-DJR_pdVeTam21xvGbn8EoO8-1Ggug5qhHiLnG3kzKDSiZ9Sa2IEIraE4w37jsLWjs0tyio-MfGu9AMDdh9zYaR_J1mdEctKCGw8KduZWb0FtUWq0q4hg=w1074-h1432-no


I don't think the clutch is quite as bad as it looks, but it seems water has got in at some point. I am a bit more concerned about the outer drive as water appears to have sat in the top teeth and they are quite corroded


ACtC-3fPk5UzmTT4B2Z2_VyuRJ8iYKLljn6yW9FRa-XsYAZn0JuVLER5L76idGP3FYWT90GKDIXvhGhdlyESVezw-Q9Y3OwRITstkMmGMvmYFiNrNXAvRL-H6xQNtRz9fazRIPJUCIR1SvOi0fQTiN8szo2-Kw=w1910-h1432-no


ACtC-3eWA5VTtSez8Frwor6xlE1gxm9-vzwVevjXti7Ooh9dZ6Pb9xDLiT276COtvxwLLLf2EVBkgIw03k27IuQTNK6KPnuuiN5rKZA4iab-UDIlLWBMSnJcIgDgsDNS2ktS-isHu1nCQBYjta5M-BzEMzAqhQ=w1910-h1432-no


cylinder head looks good, but the cam shaft is seized in place (I had to cut the cam chain as the link section was stuck inside the head)

ACtC-3c2-U2q7kwpDsvqGrC6_mHpqmxwgACNDNtpMXDJtnpm6uMx8-R_JXfGgGB1uqn5ELZdYvw5OcArJ8VVQEC0ZYO46wvF-_fmddGH4zGjMgm6onbtni-8vIQ7R1-UUfVyk06_7iw8kLNEF2lJLAOejP7Zyg=w1910-h1432-no


that's as far as I've got - no signs of any broken parts so far, so hopefully the fact it is seized is just because it has been standing for 50 years. I will try and unstick the pistons tomorrow...
 
I was doing a bit of research into the model history - looking at the Honda version guide posted by ancientdad, the key features of the later model introduced in 1963 (after CA95-3106641) were:

  • larger rubber pad on fuel tank
  • longer fender brace + rectangular plate to take indicators (or honda badge when indicators not included)
  • larger taillight
  • whitewall tires
I also noticed by looking at pictures of other older bikes that they do not have a Honda emblem under the headlight


ACtC-3dVjJG4Ae1fBKIFyImW56qgyWxuzbO46auEcR6y00f3cQrOUSRerPxPu4PdHrl8pJCKmzK6agxyinjnev5V_8iroKNNWE3SU1nixfUTTDJn3UOt6iGsZSYX2GHGz-NT8GJqgSPx1gIuynAMFw8hLhgCEA=w1074-h1432-no


my bike is stamped:


Engine CA95E-3103669, Frame CA95-3103643


so it is an early model that was made in the first couple of months in 1963 just before the later model was introduced, however it has a couple of features of the later model ( whitewall tires and the larger taillight).


Is it possible the early 1963 models were a sort of transition with bits of early and late models? I am interested because if it was true then it might be the case that the tires on my bike are the ones that came with it when it sold, and this would help justify my theory that the bike has been sat around for decades.


The tires are made by Ohtsu, who I read made the original tires back in the 1960s.

ACtC-3d5QpF_h9RAvXPtgYUg4jRdJfwA05lwefUSmY2z67vXcs38nDk-FLf6PgP8zcSFsklRse8kIBrEiwYjTXS3Nur2E_glykPQcYigvt-bX9x_9DL5ZtkC8XKFvny0aDXlJUC1E4bC5upX7lDJt9KYRMoXWQ=w1910-h1432-no


Needless to say they have are no longer usable :)


ACtC-3eZSQNg5A-hFa4BaC59D8OVZU8tJbVnSi7t9vpsHe_g0E8RhJ93vFnOZBjO0jmXVlxNZULILYsxMdsp1R0lTEBZQr-7Xd_s_Qxl1X8VonukkEZ2q8wmq6DtjlbzxpbPNa7HMAyOozWKX0XLhJILHBQqog=w1910-h1432-no
 
Ugh. Rust and corrosion everywhere, lots to clean up. The clutch rod isn't supposed to pull out with the cover... :biggrin:
 
a bit further into the engine - most of the corrosion is around the clutch. I have cleaned the clutch up but I don't have enough experience with old bikes to know if it is reusable.


The teeth on the outer clutch housing are fine, but there was a lot of corrosion on all the aluminium parts and the metal plates:

ACtC-3eTEHe93lT60AJcljIgg4qEgNj_En8q_VeHWbHRka63W05U7uc2UgH_q81rnk5ocZWAUtCgVeKRUYwAiyptEWVly02jAO0AsxzRsXJF2xEDMvQ2oUSz1bz3as1O3a21ha7eQlHnWb1sjPh6eJ4HunGGvg=w1910-h1432-no


ACtC-3cFp177bkAkSWEjpDylNJqT2YCfKnND46klOxmQM-mu1h0-oURE-3SvEfbqvXiI1U446G7cyXiQsOuTOB3ZEQYIqYAzP0saM5MGoOW9lvS-yEpLKAUf-F4xwHUH3Vz28pqAu69bVHYTTEbQ3h3ZpJRz8w=w1910-h1432-no


After a clean up the plates do move up and down in the hosing without catching but I am a bit concerned about the amount of aluminium that must have been eaten away.


As luck would have it there was an identical clutch on the UK version of ebay which I got for under £60 (less than the cost to get new metal plates) and - assuming it is in okay shape - I will use it instead. I'd be interested to hear opinions about the usability of the original one in any case.

ACtC-3dgcn5-FCeMWpJMFOArG8BibtEFMiUqzM_dvIstxBWzc7_n0zjXHCTom9Hw-xMSQPb2awytcGoJ2gs-RjNCrlSpXJsrb4GVcPdP3ontnSAYli3h2MFvO58LbmFJL1VSZiPbS59MApeetnSVvS7U_eXrJA=w1910-h1432-no


ACtC-3eoSXVxacK_ItRlDZv4fm952HdvAxLMhCzhIjKJvqfJ8rctsz2a3zw4H9a0dzKOiDxS3eBmqcvEsurdKwrm0sYhGFkHy2NW3uvxZrXAaceN_QQgZvNr-5pKMkdk5rw50dLqFv0Axw0F4LzNXzYXb1Cuxw=w1910-h1432-no


The face of the bearing on the crank is rusty which is a pity as it does not seem to be a standard bearing and the OEM one is very expensive.
I really hope that is the last of the rusty parts - the engine repair is turning out to be a lot more pricey than I banked on :)

ACtC-3dxi-I9yr2pdbqsod3tWpDRDXSCKBoqZTcvrsS6k8veA156CREaUqUuGBEuhYSA__it9M1ei1ni7O0XhL9fElx9g8Ou3t77IE5LON8aTslgfNobA7svEGlRrwaUakCBTzEYwiQ3X05g4u8LlGd2xwqIJw=w1910-h1432-no


I will have a closer look when (if!) I can get the barrel off (currently it is soaking in PlusGas).

ACtC-3cUkHtbFI_41VZoyXPtDGkXOrR3rphdwzSnyVujGR2m-HWPp7RZk-oLDdIN3qlRmMivWWZhJwDgTK4W4fHwubMIXAsqfhVDrxQmr6pKste80OjAAVHiojzuHL5bjXlXTyWwH_A1zI1-GOeJxOCYmRg8hw=w1910-h1432-no


SWgRix7rrX1RnVsu8
 
Clutch and oil pump


I've now had a closer look at the replacement clutch and there are some small chips on the clutch basket gear, but I will use the metal plates, pressure plate and centre to replace the corroded parts on mine.


It looks like the previous owner of my bike used the wrong bolts to attach the retainer plate (30mm rather than 20mm) and one of the springs - although the same length - was a bigger gauge than the other 3. I don’t know if this would affect how it works, but I used the replacement clutch parts just in case. A lot of things about engine repairs would be easier if you had two identical engines to compare and plunder!


I spent a fruitless half an hour looking for the thrust washer shown in the parts diagram (#13, below) before I noticed that this, and the thicker “plate B” shown in the diagram, were for older engines. The 1963 version of the clutch used 4x plates that are all the same size and did not have a thrust washer. I still have to find some new friction plates but otherwise the clutch looks good.


ACtC-3dyiUXgpY4coHwjnd3PWodxAAwEyzceBiKrxI6LSaS8trZxfJo08ZgVCRs9TE3gA2-LZT5SQnlIG0a8bxqf_sPdZLxOP6Dbt3s9JHsjugXPm8seYxz9jeFtARL0SZXdxk4adMk9p5Krzj9f8KHT422z4g=w1920-h1119-no


The only casualty on the oil pump was a rusty ball bearing under the piston. The pump is quite simple: a rotating lever connects the piston and the rear of the clutch basket and as it rotates the piston moves back and forward pumping the oil around the engine.


The clutch lifter is undamaged, I just had to do a bit of work to clean up the slot on the adjuster, which had been mangled in previous attempts to adjust the clutch. It is also quite a simple mechanism - the clutch cable twists the inner part of the mechanism and the coarse thread moves it away from the barrel, pushing the lifter rod against the back of the pressure plate in the clutch, releasing the pressure. The clutch can be adjusted by moving the lifter barrel's position in the case.


ACtC-3d1Xa2AfVRT6bENYeMadb20Q_If__3Oy6t6eehBoyMQxBqIZa1VihatIYv2RaTEtbmNcPSUjt2GX8xNuwYfehc7mLqRq8vvWQwqEuGOYnYsmGcnpdXk8siPaoakvE42cKoGwu873hHatq7qhUJLnSfotQ=w1909-h1432-no
 
I made a start on the cylinder head this afternoon - gummed up with decades of dried oil but all looks good so far. I'll have a good look at the valves at the weekend, assuming I can remember where my valve compressor is.


ACtC-3d3Brt54JZ4qzJHQdq6ckqLjyuOuY88lxV6OJ9H6uNzqkjjEJ0vFOBWnsK8JjYDP_6wSfvClCR9rG972fQJFoaYtMGp06AOr2xGERYBURpPrrVJjS3GvKgWul98GzH6zygguvC4ws9pnqVzBo-5hjjqTg=w1910-h1432-no


Day 3 of trying to unstick the pistons. I expect it is character building!

ACtC-3dpOrL_Qx2M5FLDFiiu1jgXLkCd-87IlYojhl22VFtgNag0U8HWLqn6TtTiTqwoA3dX_gLZpdR3Oxx6nZLDl7Y5Bp4ot4o0r4f1w2sCZLm9LNgZ5vCmF2_04hfWKTVjw2_AAeHDxnHbyi67b3bk4JXnag=w1074-h1432-no


ACtC-3cSxwuLVtKRAwiWMFaPYyRN_w3oN8QwnGf_fHXfoHGVpeCyXOtnL5KCTkROYtKq5hkAIfwPIBHlCExMhb07R-31iAfoBYxYRHojLxSWDnh2n7phV4YOR_dVwx3RpD0NWJFnPQP4Si2Wg3zuC3IgOBsIlg=w1074-h1432-no
 
all looks good on the cylinder head after a bit of a clean up. There was only a little carbon build up so it did not take long (The best top tip I've seen for this job is to cut a piece of copper pipe to do the scraping with - saves a lot of time.


Did Honda stamp the rocker arms with numbers to help you remember where to put the?


Mine has a 56, 59 and two stamped number 58 - perhaps someone had a bad day on the assembly line when doing this one!


Anyhow, it wouldn't have helped in my case since, despite carefully keeping all the parts grouped and separated, I got half way through reassembly and could not remember which way I had the head when I removed them. Naturally this was the only thing I did not take a picture off!


I did lap the valves but they needed very little work. Pistons still stuck solid!


before pics
ACtC-3f4I8SVmKhp0fP28Zpw4MbKGM2s-jpq1o9yQ5mrjQWvXaCEnZ0JXisNG33B1e8Anm_aXN_gFijjhVBGDT0fDSH0A7zET4SxH98iRBbuA0ZM71V_g4lk6syftzaK6kM4xZgxLmrTPIxTxLQmN5ONK_uRMg=w1074-h1432-no


ACtC-3dv7cR-ZjJY4S7IEn9DQDqRr7r1BrL_JvW8av_7lcma0_NNFezIXSyCzTAeLUFD1pKeNz7CcDYT9wt706ChfhV9jHsGwykyzLf_bb0uX2gQKrbLXUinDkRuPD23jFfsro8ivaLfJk6vHdovMvMe09R4AQ=w1910-h1432-no


after
ACtC-3eMdCkuq9kEifmU6_wOpHvVLwwABkHlW_OMT9flLLMC8jZaccmQEi5zX5Z-Ubje_wmkvpYTFgkZezvQD_t_hqfLYiJIYnNPXmNtJUSr70ZDbjRMrRwcX0tR6YCmkJM-AUUd0v-LVNO7kHqc6fTd2T0ZSg=w1074-h1432-no


ACtC-3evOpJ2suj2Ogit8jcrcPtUHgj8GvDzOgk5X35IJPBCEuTtHJYDen_XCckZaEuP6wBuEygoqYxgLGIsw5bgPkFaxZpiIzbMDtpMl3pTLPPE0y1ck7PcolaS0hxW7tdwZa-bSrvT-XedQJSPnolTA1EvJA=w1585-h1432-no


ACtC-3d7ENTB22dtr_KPpJQqJV71iRjM1cqY86Ils-pcZhZ9i77dhi46fYNoxYQCrrynpkhWvgDm2mCJUdpuWqLEAPqBAuvV_1h_rk36z79vmD7JXmX_3YBHXk7iyxg-ry95XtwMQglNsgRIfKNA7GpTdKPyUA=w1920-h1125-no
 
DYNAMO AND STARTER MOTOR CLUTCH
The stator was covered in black and grungy oil.

ACtC-3fPbq1fsUQU-DAtT4uWkmIzu4Xi9towuG94rsa3mtTc0Ac5qUDRA-j_4gR8MZWTtBPko1ZUIIcH_K1M8PGs3CtcXrjN3tjnQyYXsfnlZLYUqWYSAQELAEgUNym3-bKmfEH_YTv_UY5ZJPgTgUvBomSjtQ=w1074-h1432-no


I replaced the three oil seals that close off the dynamo from the engine using a couple of new Honda seals and an appropriately sized replacement from the excellent Simply Bearings Ltd (UK only). Cleaned with new seals:

ACtC-3fiM9tzo7PcPk-TmEfWLbrOUhvfxkt1PEweNV82Y6EHssDca-eMfwtfkKL27eGjXsCQtg8FlvT8CTh7kboMNfWKUUNShKVM5Rc0usG-hMaxQpbHCO-AzMr46Uv4ITTKPsVKjMruTnuMG4tmhf_qMOXDQw=w1784-h1431-no


On closer inspection there are two holes in the back of the stator housing that seem designed to let a bit of oil through to lubricate the starter chain and clutch, so I suppose a bit of oil in this area must be normal.


ACtC-3f_Gk1NH7C5IF6nPegvnvE4POIrsDccFCmu_jEIOMU34rRPk83x7Q4cUy2WFoOMy8KouXp2PsyXG-wY1e9ppT5EwgDCN66k3xLsz3UGs2vtxt2s_KKypR_MpyP0gSU1qoHGSv7imQVBQ4neOJxahRYxig=w1307-h1432-no


The starter clutch is on the back of the rotor - here is how it works:


ACtC-3ecqphf-ZFBVuX-2BkvVmVXsTnf-Hrki8JtIRszLnSeDAgVVKeOBYfgnLoiuI-2o8qC24cEUDiqasaj3XuLMwlS5XsRC5q8tmgsKTWyY4z4P0kl7nsCbJu2byTXx8Qb_I53V_4g70NJYsluiicF7EnqUg=w1506-h1432-no


Apparently the springs and rollers can wear out over time, although mine look fine (albeit they were glued in an open position due to old oil).


ACtC-3eBPTx9cIJ3ofK7CbcDAPF2OQ5wOOOXgy7uk28zmTbBKLEYT8MLSB3uoMRmbrnWZC0Z_Fw8bXUvelv7uq6jhnXZbtrZdLiloICN5vqEn8LmqMkYiqTXEaiAKNGp8dNe25JZooDGz8j9hnKJdn28RzkFHw=w1074-h1432-no


all done!

ACtC-3frVeG5yDxXt5IJVOjsUEYVlYlmhqwXVn1ZV8ndC6NzQrL4SRVQZb3K76pjDq_bjVyMEyQKnLOps4kQ2YUDAyeop0AoC7hTP8OTBTtF_2cltd9LU1d3MIQwumjKxwrFzBlLrpz_5Hu8MnVrA9_dGp7tMQ=w1910-h1432-no


Pistons still stuck solid :(

Starter clutch parts should always be replaced during this kind of effort, no matter how they look. The caps, springs and rollers are cheap insurance for the future

Tom

thanks - good to know (I've now added these parts to my cmn watch list)
 
AIR FILTER
The filter has holes for two tubes and, although the tubes were detached on my bike, I think I have gleaned from the workshop manual what they are for.


before:


ACtC-3cYNiK-y3jqnStt5iSYk0W0lXkCb1qbs4GpcXpJRs11eyfQv_gWRTEkGu--nAZqp5PieiG-5OXZJJln5VRXW3Kwh0fhyk8kai-3OxhuzHvgTquFIcxPN5rQsdlcHROJHrnvaCkrpVVYLRdbMjQXdxqcsg=w1909-h1432-no


I managed to find a NOS air filter around the time I got the bike:

ACtC-3dx-FzL8BlGNVRWEsU0Jii3yyxCVFTouJ69Zb1sgJgaKJMsPMnbanAOJpNWnw6dd3zeoZBSPCfOPzNVYEHVcqCy6GtJqfiCKQGNLqaB_G6oAZg3yqa3zGY6b7ZVHbMbaz9T7lUdVo32r6XzLJj6G2L9Iw=w1074-h1432-no


ACtC-3dMNOkTVd2jTLijc6HCh3HMoRgYBkUxUR2gOxIGMPGDiEIWkBer3o3V2gtnk2RmJZrns-_vvt6DPMtbQty7lkENvGvcpW-4xnoZPNp8Z5zxTCPW2ZQQHTvSIvrEbjzqs-CYVs9M0p6vpz8DZemyOflqCw=w1910-h1432-no


One of the tubes connects to the power air jet so it can be fed with clean air from the filter:

ACtC-3cisRgjxUZB-refgqIfUmWWRz6BVsdwWJVZuBHyZ01RjfesJZJTXGzSFzH203H7HK4r7gwfkzBHGH5JPYK7TZtmcEYPOmViZWOM4yL2fud-olWAT9GNxYoj-l2Nr_4W2bVOi2IPQi-6_-7dgnwVOAFSzA=w1078-h1432-no


The second tube connects to a nozzle on the black insulator that fits between the carb and head.


ACtC-3dcCYDG6xRduD3FIzmmwIiING2yFh_Xg105rq8HxMDPYr-4bHnKz7etYRNbT2b_NRw09n0VsHqJenI-pNwXvjck8R_MnMP3hk5qOejuH0-gIry7hvkEMgzAK7RFjKZjfx-TwoRVRrJ1ZXXEO3QYOnoaEw=w1074-h1432-no


Behind the insulator are two air passageways that run to the chambers where the intake valve guides are installed. The passageways are aligned with corresponding holes in the sides of the valve guides.

ACtC-3eyp0xgKABBnFzGOQMJc4Er_bnGIBqY5oWY1suMkcMzNtIND-XN32h5RD4ByS-btPf5hKzBOtd8JHFIL_Ccb48VH5tCiZOCnAM6h9wdQbc2cQv5-TezutiLVeRdb52ib4sItpGCSyua3ptPS6eygEaURw=w1076-h1432-no


As far as I can tell, the idea is that the vacuum created on the intake stroke will tend to pull air from the vent rather than sucking air past the valve and valve guide, thus reducing the amount of oil drawn from the head into the piston chamber.


Here is what the manual has to say about this device:


ACtC-3dWTJ3FeVU7rQypEfSYOgkjGL2bjEUsEfHmSUxHTzjhsNTGaCKlIQa1aLWxAIB3BC2l1JUGNgJ26EnmKq0BIq_sHFOLRmr37yb4Gka0XAFVzGIbKXkzkFXEvFZf1fxc4qpHW__s0d-Da4ZyzEfjx2g9Hg=w1248-h1196-no


I have read that it was not unusual for 1960s era engines to be made without valve seals - I wonder if this type of vent was tried on other bikes?


There is also a vent in the top of the cylinder head, which is presumably there to let any burned gases that leak past the valves to escape. There was still a rubber tube attached to mine, it is rather long so I think it must just discharge into the open air at the base of the frame. Perhaps the fins inside the cylinder head cap are there to trap oil so it cools down before dripping back into the engine?

ACtC-3eeZ4oHNPWTzmddekNMOfBUJF2d9JrQ5y6tCJ0V3G9kL0axPCa-DfbTgTGABYnld5-CjZYEF6MztRq6SM_U1lVOVCIpMLRYhWjCoO4xNe1KEE_fcCpMAh4vrSw3sujcuus8n2CzPhm8cpoH3tBFVLOB2A=w1573-h1053-no
 
I found a good explanation of the breather in the cylinder head cover (it also describes its role as an oil cooler). This is from the 250/350 shop manual. The workshop manuals by Honda are excellent learning resources for us novice mechanics!


ACtC-3eWxCPQBMvgyw7pF7sPb3SvpAO-edMLywcIMa5r8D1Su_Pw6QbedvKVpRjZXE8Zzcl0knfiSiBxiGWUFy5o1dkyP4eaLRDU7lDwW6xnsemOv8OH5DacBI_dW0CGEf7KJFjVAZNG3D3GjU2qQiqFTCz4Qw=w1920-h694-no


interesting also to note the remark about humidity. I suppose this is the reason that there was very little corrosion in the cylinder head of my engine compared to the rest of it...
 
CYLINDER REMOVAL


hooray! I finally managed to remove the cylinder. I am not sure there is any particular trick to it other than perseverance, but this what I did to get them out:


After over a week of of soaking the top of the pistons in PlusGas I heated the cylinder with a blow torch and then melted ice cubes on top of the pistons to try and cool them quicker than the cylinder. I did this three times and then, after a few firm clouts with a large hammer, I saw a tiny break forming around one of the rust joints.


From there on in it was just a matter of patiently hammering away at each piston until they started to edge out of the bottom of the cylinder. About 3/4 of the way down I was able to get some releasing fluid in from the underside and knock them out entirely. I gave up on using the large wooden pole as a battering ram and instead used an old socket (I think the wood absorbs too much energy, but the metal to metal contact allows you to sort of "shock" the pistons into movement).


Anyhow, after about 3 hours they were out! The crank does turn, albeit with a lot of resistance - I will hopefully get time to open the cases tomorrow and see what it is like inside.


ACtC-3ebKRiFiEC6sPJPzuBL3n2ZGaxadbpnm9amCYQPeb4qAHvHyGnTO-FLwWxilg77hlQ9POBBV6QmdWpKgLhduhMNlDne5csQxvfHgrCM2c--1YAZ4S9udLGcsrt1w_swqcNJG6lCTeO6PPasoIQvyfJRdg=w1074-h1432-no


ACtC-3dt1hGzNGnhA2fgnKe9vFugJeYhDKAMV1XJWYGrGB_yKKiPNciuatkRfVyjIsQ96HdxoQ6gq5sIijB3q1efnyD529I-j2B5-4TdOZXiRRYveRLGaRFH-nXfyu8_mCWio49ntER0ax9hTjvg6eTV_53fFg=w1074-h1432-no
 
TRANSMISSION BEARING - QUESTION


I am going to need some help with this part I'm afraid! Here is my first question, there is some rust on both the bearings on the gear shafts (#21 below)


ACtC-3cA_mTjVIqf5LR8Gjitn25vxPbP_AiE6jLDQ369ahkoWvMMrgfcc5YFivuHqAONB558e0vDnznk1Kl3UFOab1ockEeuaWpRcN1klKNcyq2-KrWGdx2dPxJL7N4gX-8m49-kbFLk9FKJH28KzhxDXYTymg=w1118-h1432-no


these bearings are no longer available (they have a slot to receive a set ring that locates them in the upper case, so I don't think a non-Honda replacement will be available either?). Do I have any choice but to clean up the ones already installed and hope they work?

ACtC-3fyM3ptbFArCpNkpVN4u8mGjQRW3f3soDgQLdYEFbYDshX1ggR7hVF7KrGzJBNGc-oeJtWcgDaijeN2ZmKfmiTmipRKFg7IDrwN49ALX2N36qH1sg3lqNX2KwGIsIun_UjVjifQH4Tfwdnp4TdfPEHJvQ=w1440-h1080-no


ACtC-3d-HaPUSeb5K-Flg7qL5r-TkIVeXEnKIoVkRII-w22gwPb09XDhBv_JexOF1OXDpWBjMIqDtxCqaqJ1kLJNtwkL9HyaGCwtK5PGu1WqZJY2WNDQS3usQtGr83L4R0bQauyK6PeNaieQMp5CEBUD7CI7_w=w764-h573-no


cheers
Nick
The real question is, where exactly is the rust? You said "on both the bearings" but surface rust on the outer races and even the cage for the balls is not important as it can be cleaned up. What about the inner race and caged balls themselves? Is there rust there? Do they spin free? As long as they spin freely, and to make sure you should spin them a LOT to be sure all surfaces of all of the balls encounter the inner race eventually, then Evaporust will remove the ugliness without you using anything else
Tom
 
Thanks Tom, on a closer look there is just surface rust on one of the gear shaft bearings. The other spins freely and quietly after a soak in evaporust, but is a bit crunchy when held at an angle so the ball bearings are running against one side of the housing. Hopefully just a bit of rust remaining so I have left it soaking overnight.

ACtC-3ejVdwkYjnw2pMr_Uu4SPoZOPOiZkurkfRLM6-BOKUc6391TEfELo5AZwI2cWgVSbfS8CvDST8DWd4CnDQ70eovOLhQqkBU450_LxTucXyA07GbXUsLSy5-3ntS43fnmrxONgG-DoF_Xrw2IycBymx0rw=w1074-h1432-no

Out of curiosity, if the bearing was no good, would it be possible - as a last resort - to use a standard bearing (without the slot for the set ring), perhaps held with locktite?


The crankshaft looks okay - it was quite rusty, but the corrosion was largely on the base of the weights and removed by evaporust. I had already noticed that the side bearing on the clutch side was badly corroded, and luckily I had already managed to get a NOS replacement on uk ebay. I don't have the means to dismantle the crank any further so can't inspect the centre bearing, but it spins freely. The other side bearing was good as new:


ACtC-3f1VhfQVelLVV8HD3uTKCg--y3L-EgJvhHiJZHSzTBrVIm6WsKY-90OOMOc8vyIKrnW5Lvog2gHHSRnYMe2GOLGT869MIZCAT61fDrwHlOor0O2_X3Ygou0DwLIfwM_FimoKkxINNCLcqkYv0cy0svLxw=w1910-h1432-no


In other good news, all the parts for the kickstart are in one piece:

ACtC-3dtMMohqszDhSgeVgBJr2nfiAoNZO9Ch8J01iVjTQYyTC0fhphA3f5FCu7RWhOT9LuWhV1QR4bw_cWZnbrfWSRBE-fVuNeHiWKXw-ogjW30-50uuWgM1H3jknlS-WHNCax1pcyDXlQAQcCRJj9AwXAS4Q=w1910-h1432-no


I am relieved there does not seem to be anything seriously wrong, but don't have the tools to do all the checks in the manual.


I've checked the connecting rods for up and down play and there is no movement, and there is about 1mm of lateral movement. I don't have the correct tools to do the run out test, but I am sort of banking on it not being a problem on a low mileage engine. Are there any other checks I can do without a dial gauge or press?


before:
ACtC-3eTgCF2p8lWTxJ4oVLKBIY3gKb-DiwqxBzLDuccs6KkuRtSlxRiT-EuoOqvWn1b0UjTM40QVGG5iyf1RKLBNMWyfkI0PfUjmC0501c1DLhTZS204bWMxHHIGcHMNcB52rdGBS2PUcC-bAWMRxwzP14vow=w1074-h1432-no

after


ACtC-3dR3RoRx8-1_K4bibL9xEQWat_TADj_GSuvnrHm2X1PubbyfkTtoFo9cQylOSmau23ZMnnjzmqrKn8ZKtJqb_CPZ2i0BmC7yd0Ga0CENAZMJc2fVFoJG1zxaBGxTVW-dAu_2KdNSGlvRfX7hb2j5UKXhw=w1920-h695-no


I think, despite the ugly looks of it initially, you are going to get lucky on most of this stuff. You can check side clearance on the rods with a feeler gauge, but as long as they're not out of spec and you feel no perceptible up and down movement you should be good. I'd imagine the inner crank bearings are probably okay as well since they were better shrouded from the dampness influx over the years. I do not think it would be safe using loctite on a bearing without a set ring as at least the mainshaft would have some lateral forces affecting it because of the clutch... not sure what the best solution would be there. There has to be a supplier out there somewhere

Tom


cheers, and your prediction about the condition of the inner crank bearing was borne out by what I could see - there was no sign of rust here (there was even still a bit of liquid oil still in this area).


I still have my fingers crossed that it is just a bit of loose rust causing the main shaft bearing to make a noise, but I am on a look out for replacement just in case.

[edit to note that I have now learned that the correct procedure when splitting the crank case is to turn the case over and then lift the bottom case from the top and not what I did initially (lifting the top off the bottom). Not a big deal here as I was going to have to remove everything for cleaning, but in other engines the crankshaft is bolted to the upper case, so easier if all the parts stay in the upper case. I did wonder why the upper case was shown upside down in the parts diagrams, and now I know!)

I should also really have removed the shift shaft to avoid having to unhook it from the shift drum, but in my defence it was stuck at the time!]
 
Here is the first evidence of any mechanical problems that I've found. It looks like one of the gears has been rubbing against the inside of the case:


ACtC-3c7uskI1bGvyEzBI90OZCvFLKjZPfwaoDwt2WA2YpG6m5CHI5F7BzoADS1kc2xicKtbfNvZiQbU_TXg135pbj7wXMsD7tLyZ2rBaXpxAepSCYueVOxKR4LedbVUvJngtay5qxx9nUIxDHSr1wa-rKZZcg=w1074-h1432-no

The gear (13) buts up against a brass bearing (1) which is located in the case by a metal pin (3) in the upper case that fits into a dimple in the bearing. Because the bearing can't move, It is almost as if the case is a bit too thick in this area and that is what caused the damage.


ACtC-3cCqKq-S7s2Hvstquc8WPPOiB1ewExlcRW5EPY9PcHEDuWKYTHz1GC9qNhhg-vFnIaRtrJYld8GIObvTruizu7nZFalAYWOixHX8DaiLttB26c0tgs3TVKdZt_l2I8Qa7hJeUf3--Snd2gJ_0w3TNxMxQ=w1118-h1432-no


Are there any other suggestions on what might have caused this to happen? Or ideas on how to stop it happening in future?


What does the locating pin look like in the other half of the case? We've seen plenty of engines reassembled with the small end bearings/bushings not properly located on the pins, and then they get punched through the upper case which results in shaft movement that shouldn't happen


Tom
ACtC-3dv-BmL5RDOVhRzMjqcScjzZXjHui3xr5mN6KbyrKqf0gKWVhPqLPbmn6yQuJOGgiSAdHfkd_K5euyHV5dL0EswNpvy4Vi-gU3w2X2BOgGdBX3RbMMAYMAHh8CmW47xW9yQtxrjDdMz71smEdjbeiLthA=w1910-h1432-no
 
luckily the problem was not as serious as the pic above. It seems that the dowel had been knocked sideways, allowing the gear to make contact with the inside of the case:


ACtC-3d41cqRilKxwoecJy1iE89u3AFW8wxM3T27I6ER-coXmsjKdxbJanj-WP8S1qnrRNEOHGxNPBezVz0Hj1Cpaerr5-32DN0fBHpiYkar1068zLNulCHlbg2_zepxiCToZ_jeGioWnlMPvA6eplKHSK1jFw=w1074-h1432-no


... at least this gives me a plausible theory about why the bike was put away years ago: perhaps the sprocket got a knock and pushed the shaft and bushing out of position and - when the gear contacted the case - this stopped the engine.


I have straightened the dowel and it now holds the brass bushing in the correct position (I've ordered a few solid 6mm dowels and will replace this bent one for peace of mind).


ACtC-3eK_EKbrIS6DqXBvkNh61pnvwM5b_eWpsCe4M2eitXm6A1ylCbfCic2C19X8gI0gH1jatTKW_I-6yAv2wqBSNl3gnVWNVwdKjfY67j_oGcr-XcwlcPo-SkYNZtyyr3qnl4vVY3bvlDyZRtz46VFfC7Yig=w1910-h1432-no


Many thanks for all the help so far!

I knew something had to have been changed... Honda was much more precise than that.

Tom
 

Attachments

  • download (50).jpg
    download (50).jpg
    296 KB · Views: 6
I've decided to reuse the shaft bearing: after a night in evaporust (hence the black stain on the metal) there is now only a very slight vibration when the shaft is held vertically.


There is a bit of movement between the inner and outer races but it does not seem any worse than the one on the other shaft (which was in pretty good condition in comparison). If a replacement turns up, I will swap it but otherwise I think this one will do. We shall see!

 
Gear shift
The gear drum looked good with no wear evident in the tracks that the shifter forks follow. I am not entirely sure what the signs are of worn shift forks but there were no obvious marks and they were straight.
ACtC-3fKinpdHycN5WzO-EoFMgTVcp0ceNMC-66AOKzjlc_Lu0nRUCAWq5usBIb7bkuLWPepCGGcHQhVlIyDp9qHPX09DywDph-4287WiyGk_UBxjiX2xbbC89HOnfeDI5mvC7S8BrtziAvybFxr_YHShpzmjQ=w1074-h1432-no


ACtC-3cb9kJxR516h2xvqq0QMoMWwsppFJUODaAaWd_oIbVS4wTQU8FSwqQG6RswHtYduhZrmR6DzH9mDDCWzIhH-FMsauzpECcIZO9gN6q2tngyh2I177JY1SrI-_PM7mYG20t1pvGDkGbkQ02yPJz3P5VW4w=w1909-h1432-no


ACtC-3d93Nwe66hc71Z9BYjOWKOA4BMjLtGlcG9Fyi2Vp5rVFFA-IxvNjVxx-s7jzur88gR_UUaCDon7S23Fdtxs3MY5zqjGn653ClGJvpV6ENiR3pvlaBJtj5A6cLRwO_yDugOPAwZpPjDnnt0_ILpnoGihgw=w1074-h1432-no


The parts guide is a bit confusing about the different shift drums and related parts, since there were different versions depending on when the engine is made and whether it is a rotary gear change (ie one that goes neutral, 1st, 2nd, 3rd, 4th, neutral in a loop). This model is a return shift and has a distinctive shift detent, which - rather than being inside the case next to the drum guide - pokes in from the top of the engine. A small spring loaded wheel engages with the dips on the guide below and this locates the spring forks in the correct place.

ACtC-3ebgDtaji_M0XUHzKp13NfD-ru-PcSJu_5J7ynLTJfHvfetCD1Q3QjK8RTut_aKbBj0R9FRWb27NLl264-aZTP3J7-VSM1TdUD089H1dhZptl0aQFRLACyZDm0SphxVv_F3B3ZsS2uN6BfRmxL18gsoGQ=w1377-h1432-no


It was very satisfying to see everything turning freely and to watch how the gears work!

ACtC-3ehnYzSE9pI3HVisfQdUZ1MsJFcSJQTIGIi46tiEWs955JgD3VpdW0rGA61bmJJ1N1ECo4oem_WKCEdsv1InRKaQfHm064sOMhA9ifIYtxn7UcsmndSsyY9uu73wf9fBOzdx9vqUeB5WDMLsrMd5aM2lA=w1074-h1432-no


In the picture of the shift forks, the one on the right has some wear on both fork tips near the bottom of the chromed area (well, they both do but the one on the right appears grooved a bit)

Tom
 
ah I see, I had not really looked at the sides carefully enough, now I can see clearly the groves at the base of the forks (worse on the inside faces). I had another good look at the dogs on the movable gears and the holes they fit into and - to my untrained eye - there is no sign of rounded over corners or other damage.


I hope the damage on the forks can just be blamed on normal wear and tear - I suppose I will find out if I ever get it running :)


ACtC-3e_0Fg87GbZoG2lekVLQO8rg4mOKoHwy6y0HJ7d4npbaz_xB8c0qmKF1afax9Diu0wgpGtGl8Zq5fnKCqloCQAXhAShIPJFpq0UZRL-gfIktVRFNt9AxGugLtUN9Yaf2z15G0VmE82NE8NR-sIP21LblQ=w1276-h1000-no


ACtC-3fdW2QLqvAbYVPpWWwB8qtZEqkThTWfixZfHGSmCEiCuFYKTjvkDlS78jjAp_FDO9wuqQBO7XRKDWFnbidEtZ9qdZHd6Rt14LkVuhknqJQhc9fW-t6KxOX1oUXMGD3XjrE5aw8-Aauq8ycrIPgYOfIyzw=w1493-h1276-no


The second picture shows a little more than normal wear... be better to try to find at least one new fork to replace that one, both if you can find them

Tom
ta, on the look out for replacements, no point spoiling the ship for a ha'porth of tar :)
 
For the riding I'm sure you'll be doing with the bike, the bearing in the video should be okay. It's not like the bike is a high-performance piece you'd be racing others from stop lights with, or entering in the vintage class on the Isle of Man... :rolleyes:
 
ah I see, I had not really looked at the sides carefully enough, now I can see clearly the groves at the base of the forks (worse on the inside faces). I had another good look at the dogs on the movable gears and the holes they fit into and - to my untrained eye - there is no sign of rounded over corners or other damage.


I hope the damage on the forks can just be blamed on normal wear and tear - I suppose I will find out if I ever get it running :)

At this point, it's obvious the shift fork marks are at least the result of the shaft that shifted due to the small end bushing pin that was bent. Still, if the forks were available I'd consider changing them just because you really don't want to go back in there, once done you'd rather be riding it
 
At this point, it's obvious the shift fork marks are at least the result of the shaft that shifted due to the small end bushing pin that was bent. Still, if the forks were available I'd consider changing them just because you really don't want to go back in there, once done you'd rather be riding it

ah! yes, it is obvious now you say it, but that had not occurred to me at all.

Coincidentally the second replacement shift fork arrived last week and I have now fitted them (along with replacement shift fork pins that I noticed had worn at the tips).

One thing I am learning is that there is more to inspecting parts than simply looking for broken/missing/bent bits - it is dawning on me, after observing how people are able to spot tiny clues in the pictures posted on forums like this, that you have to really look at each part and think through how they work and what might have happened to them in the past. This is a skill I am having to learn from scratch - It is a lot easier to do when you have a new part to compare with!

ACtC-3dyJqW_ixPnf0MENtU8VnXHB7QZCV7p5H8FOIz50Gi4ME6zFhiAQPD9zHqBFjBe_DkBi65pMRjB_LQaYJoQM_3yiyd0ltcl9FMIRyD9lBYrxhzOj3tvnZiMFitCHQpWJYTCQTSsoq-evbMXQF0KaF_uiQ=w2040-h1530-no


ACtC-3et20nqnML4tIljynkyaOdEF-64Cn2FQA9KTTJ-uNnIAWAimVSj0hScHS58EVUZdZNlGLnZVTQqGfd2W9Cz6l2tWPNo-rXG4XMLmhHUPPk1QbzGSblygAKzakpoITaK9ujax267NYuh_uCqXlPZTqsicA=w1148-h1530-no


.. I am going to try and catch up with the remaining historical posts later today and then will carry on from where I left off next week.
 
STARTER MOTOR
Out of curiosity I partially dismantled the starter motor. The workshop manual is a bit cryptic, but the procedure is not hard to figure out:
ACtC-3fEEqizgdSdTC44yTgfvyRyzyEGbvFVl9rW3e-xWiU-NROqTux38reTUUUhyXu7Y6iyOa61LKx8yn8v5vzh6lNBoQBXPAcMt3ye9_GBQcmmkVI0fBoGxNOK6ibD2gTvyt6aAqI9ZAN9Gi-0GuOfcOENvw=w1680-h894-no


you start at the sprocket end, remove the circlip and then the sprocket (this is a tight fit so you might need to use a gear puller or you can gently tap it off the shaft). Note there are a handful of thin washers under the sprocket to make sure it sits snuggly against the circlip.


Remove the three bolts holding on the top cover, which can then be lifted off. Lift it off without twisting otherwise you might break off the small pin that aligns the cap with the body of the motor.


The cap contains two planetary gears that fit into a ring gear in the section below. These two sections are separated by a thick gasket. I reused my gasket (it looks like Honda never made a replacement) - it is very thick and squishy and I can't see it leaking even though it broke into three parts.

ACtC-3emt28_-dCR5hnCLNHXWmcmsa_Puryh_e8Hu4e5-6sAvLV-zuIczdRkGEykn0GiFNsRdo6GdfKuYtcumt4AXnZO4hYmf2Q5goW9dEaU79IGC4BN6gyXNgzS2RsaXv7c5dKdJfoZptqHNh3FrP3nNXgsbw=w1050-h1398-no


as expected the mechanism was packed with dried grease.


At this point you remove the two long bolts from the other end of the motor and the part of the motor containing the ring gear can be lifted off from the main body. The ring gear is a press fit and can be extracted for cleaning.


The armature, commutator and shaft can then be lifted out as a single part.


Finally you can remove the sleeve that covers the join between the base and the main body (the sleeve is held on with a single slotted screw). There is a delicate rubber gasket underneath, which I think was probably glued on to the base, try not too damage it too much as you will have to reuse it. The base can then be pulled free from the body revealing the bushings (this section is also located by a small pin, so be careful to pull it directly away from the body without twisting it).


Here are the parts after cleaning:


ACtC-3c0_EKXDQ3PBQTWTWiS1gAkeJ6LEgiA1DWLOP34isIYQ_vYVX31QvlCQ5gTk7QZ2YB0J7e5qge4DRg4P-U6zlygk_MrfhE4y4XSCfpRF1IgQBXhDEDG561vGOCtb-dUXRal9emBWPIpycuoAqKGO1J0Qg=w1494-h1120-no


the brass bushings are held against the commutator by springs. Other than the sprocket these are the only replacement starter motor parts that Honda made available for the CA95, presumably because the rest of it is unlikely to go wrong given it is only ever used for a few seconds at a time. I've no idea how long bushings last, but there was a fair amount of meat still left on mine.


Other than cleaning the commutator and bushings and refilling the gear cap with fresh grease I am not sure there is much to do in the way of maintenance. The only thing remaining is put it back together and check it works! You just need to attach the negative terminal of a 6v battery to the casing and the positive terminal to the cable on the motor:


to be honest, it probably worked fine anyway before I took it apart, but at least I now know what a commutator is ;)
 
PETCOCK
welcome to the world of the CA95 petcock (or as we would know it in the UK, "fuel tap"). It is a device of impressively byzantine complexity, requiring half a dozen different gaskets and o-rings of different materials to stop leaks.


Possibly the designer was competing with the engineer that came up with the ginormous horn for the most OTT object to adorn the bike. Both parts do look cool though, so hats off to them both!


It works thusly: two tubes extend into the tank, the longer one delivering fuel when the petcock lever is in the "on" position and the shorter of the two tubes delivering fuel when reserve is selected. A cork washer surrounds the ends of the tubes in the petcock and as the lever is moved left to right it reveals one or other hole to let fuel in. When in the central "off" position the ends of both tubes are sealed.


There is a nylon filter that is sandwiched between two rubber gaskets, fuel flows from the tank and fills the petcock bowl below and, as the fuel level rises above the filter, any debris is caught in the mesh.


You remove the petcock by unscrewing the bowl, extracting the filter and gaskets and then removing the 3 screws that secure the petcock to the tank:


ACtC-3dT_-54w0lg4afpQqzHYn68IJDbF5JXYvK5CrksEWvRo0B1M9P-jb6TjFsNZ2mLhuy1vx9JyOrHgiSKO9GEEioUbVh3VMwm63DOrAd7vvGPvJuAEKCdFPJS-iNZo7AOOLc3jbW7KYR0x-aHbCfUl3NK5w=w720-h960-no

here it is before and after cleaning - needless to say all the gaskets were rock hard and cracked, so will need replacing:


ACtC-3fPSMEqCUp99s0Td-hKwWBr7yEZ5dC7o3D9_HTxOwGR2pZiQIEudGSeenvszbrXBh00--iZwoMDpYnVvkf209M5h8UUbg0WEqmAwGQVfZNn5FFK1ldqs5z6idqSqetBYfS19aCNemtV4KHEURVzBwxSvw=w1680-h1260-no


ACtC-3exIrYT78l1vgbba7MwY3hmTMu6NcXM8SM2sl0M6_3Z_SgYCQr9fuKeP_HYcWZixBfZ6cURp3z72Rtzh25chlZFJwtcoOqqmKfU71QrpUdq3Up-iBQjT04AKpAq8nBYcYzT5hc2awD9cJUuLE7WIi5aeg=w1680-h1262-no


Three cheers for Honda's 1960s design vibe!

ACtC-3c98qu4CZkKZRfvcCQ8jUSGJS4GlbSf3GaF-VsUkG8K438x7Fd00iFtOPzPUG4vhU7SBQNOoTf2MVUWxYU2Ya2HRqVPWS-58OM0AMQ4zyoorvgt4xEn5d-vbZSKJGrZnft4e2Sd7JJyB-R0x_vGEcRZ6A=w722-h960-no

The period when Honda and other manufacturers were making components that were serviceable and rebuildable - the primary part of the device was durable with replacement parts to restore new functionality. Today, many petcocks are riveted together throwaways


Tom


indeed! I have left a battery near my detached horn just so I can give it a little "peep" when ever I happen to near by. It really is a thing of joy.
 
having read yet another thread about the hazards of misaligned dowels in the upper transmission case I dashed into the garage to replace my damaged one.


It occurred to me that it might be a good upgrade to replace all of the hollow dowels with solid versions to prevent future bent-dowel situations, but I could only find 8mm dowel pins and it was such a faff filling it down to the correct length that I soon gave up on that idea. Still I have at least replaced the damaged one.


ACtC-3cCkNNAb1EemPL5xIXtSKcKSoJ5kQTB388lZ46A1LRFujI3LYKzPzFq66DG40ldTziMtNYbuAIy2LKDyRcbnRKbXPczrgVoK3o6hwBCB5LkW3tC0b7qEX99CHBazLM9fxcexczzYepTwRUPOYAJOJ28Hw=w960-h653-no


As suggested I have found a couple of NOS gear shift forks - just over £40 delivered - but they are coming from the US so it will be a while before I can finish the engine. So, on to the remaining electric bits now...

Nick, you can only use solid dowels in some places - most "knock pins", as Honda calls them, are hollow because screws, bolts or studs pass through them. The instances in ends of the small bearings on transmission shafts are the few places Honda used solid pins


thanks Tom, I did not know that. cheers!

[edit to note this thread was originally posted on hondatwins forum a couple of months ago, hence the confusing order of some posts - the shift forks have now arrived ]
 
Contact Breaker Points
This model of bike has a single set of points for both spark plugs. The condenser is mounted onto the same backing plate as the points. All the parts were made by Nippon Denso.


The mechanism was a bit mucky just like everything else on this bike (well, apart from the outside which was spotless!)


ACtC-3dEfXL3VwiuU2-TKPosJ6OTPCgfyZbYeTjVAyyNtOOfP7Z94G4jzey109B-ZB7eoKKSecctRExwgh0oVpIkfsM7d8qCY165KQtjqTvMmNDlvnEa4v5vo1Nn41XcBBBCzAPcBGlxDZ-qLB1w3y-NdGNQhw=w960-h719-no


I am still trying to learn about motorbike electrics and pretty much every time I think I've grasped a concept I read something else and realise I didn't understand it at all!


As far as I can glean from the text books, the condenser acts like a temporary battery that buffers any extra current in the circuit as the points open. If it is not working then the extra current can "arc" across the air between the gap and the resulting spark erodes the metal on the surface of the contacts.


Here are mine after dismantling, there was a pit on one side and a corresponding sort of stalactite of metal on the other:
ACtC-3cRZ_-qaGLytwvgfPVtlvV6BraUXK7UlpubGwopR60jEHieWTZnOfzaqCh2L7pWD2iDcZZDNNRpoJJ_2UbefoFEB0jwc5bzcnIIz0Fc202_-igfKZO6JTkyYkemlvSC7bh0RyoipUBOIuF8XaExpaGF7g=w960-h441-no


I replaced the condenser and points with Denso parts. I also removed the pitting on the old points and will keep it as a spare, but there was not a lot of metal left after I got past the rather large pit on one of the contacts. Removing the pitting is not hard to do, but it can be tricky to keep the surface flat and level. I found it easier to rub the points on a honing stone using my fingertips as a guide to keep it flat.


A nice touch on these points is the provision of an adjustment screw which you use to set the points gap, rather than prodding a slot in the backing plate with a screwdriver. The screw head has an off-center pin on the rear that is located in a slot on the backing plate so that - when you turn the screw - the position of the points move in relation to the backing plate, opening or closing the points gap as needed.
ACtC-3fmz0Frtqrl_enwivYVAoJFNPuAM9T-VCcS1ewWYGGpe8a8RamNBnLufTI0kXAA0OzXMPMJbbVCC8zGA64OaHC15UIagv9Q1ON-y5otCQXy-Pfrla4N2kpEdElA0r97O1rEko739Q2RoIi1nN8Wk8CpHA=w720-h960-no


ACtC-3cfHwz8nhssiY53ichSHsIXzGAJAOwLAXGgfyjZEFTcuwpmGyw0Wp4VXxcc3i0HEMJwl8W9ig3krmBUHyVVEDPubhyiZOZmS-ECriKEltsxvB0O9kyxmgJF5lt97ML4ThQ_4n26ENI610ORlC09MDbFPw=w720-h960-no
 
Aftermarket Points


before I managed to find a set of NOS Denso points I bought a set of after market points made by a Japanese manufacturer called FEW.


the grumbles about aftermarket points tend to be about poor fit and finish and some people report that the points gap goes easily out of adjustment when in use. Here is a comparison of the FEW to see how it fares compared to the original.


FEW on the left, original Denso in the middle and replacement NOS Denso on the right:


ACtC-3dCoFPj1X7axbENOpjb1GUTcDTA23TETqC2VKOuQCYJ6uU6smD3dJ54xlRFZtR7EvZZ9chUNhXaPLE5T1hZcuVrKqZJLCLwJX18BXCUeTmd-I5wYjx6YH-nuOAIkb8lcESkuf5lZftR8j1j4as3ieLMSQ=w960-h719-no


As it happens, the newer Denso differs from the one that came on the bike in a few details: the older one has a copper inner spring band in addition to the main spring (the new one just has the spring) and the fibre arm and heel is wider and held on by a split pin rather than a circlip. The FEW replacement also has a copper spring band and the fibre arm is actually a closer match to the original than the new Denso:
ACtC-3dnzp4leJ_NKKXVwOwX-p3Vd219V2mRMjea2nPj2CfhlsYbO0Xk10SDgugZHd_jG1BvtPN_ieK62CQmpphLIN4jpWnVjfgLTKMnYQ44H8T8kS_elEQUUXJJ6YQFukiMGDs9kIpMgVcHEdRjaktgqbcNnQ=w720-h960-no


The arm on the FEW points fits well on the post and there is no play. The holes in the backing plate also match the positions on the Denso although, as you may be able to see in the 1st picture, the topmost adjustment slot is not machined very well. The fibre arm is held firmly with a circlip and two copper washers, however, there is no brass bushing in the fibre arm unlike the Densos. Perhaps wear on this part is the reasons that aftermarket points are known to go out of adjustment quicker than originals...


FEW ( no bushing):


ACtC-3ct5xbYA9bcBWIUyk1q9YWOncu7G2_2moDcmYRrmYPWyZ_xIdejboYSDvZ68TBLaG6t48IKcQo5QxUNlriEMb4aodESQYYOeMFlokrp0IgnHtX8bcn8F6WtN5kMBJhD2b3u-qkS0Q_OEQflF02QLU8asg=w720-h960-no


ACtC-3cFrko3QFeUTdasuSDl5nofjIjzpYYVMgZGgbLOV5ISlopIMEKWZkEK_WBnSj9ZotkdL05nf-XlUEFTYd9sBqHCvCHh5JGjsMbKiRP-HJ_5I8uKuWGF9pkFeFx5WwyUXXF3laWoSCjMmApSvG4pNwFroQ=w720-h960-no

the only other difference I can spot is the FEW version uses cheap looking plastic washers to isolate the backing plate from the points, whereas the Densos use fibre washers.


I suppose like all these things you are better off getting genuine Honda parts if you possibly can, but aftermarket parts can be got to work, albeit might need a bit of tweaking.
 
SPARK ADVANCER

Like most of the other bits in the engine the spark advancer was gummed up with old grease and did not move freely.


ACtC-3eUgO8fD54fklve3PlS1FKNmEUFFl7wgdz4lvMmE_QFCQfzqlzJowqnOPwMTStcaFsH-zTnAVTNWTrE0T7oyBJcefK4A5YVE3EFxjb-urqg8x8pbyUUKUU3K3GynAmFeI3cYSzI3oZI5t_XfnCikKWsiw=w960-h719-no


I am a bit hazy on the details, but it seems the spark advancer is needed because fuel always burns at the same rate in the chamber regardless of engine speed. This means there is less time for the fuel to burn as the pistons speed up and - without a way to bring forward the ignition point - then at higher engine speeds some of the fuel would still be burning when the piston was already part way down the cylinder.


Because this would be inefficient the advancer is designed to bring forward the ignition point in line with the speed of the piston so that the expansion of the burning fuel always imparts the maximum force on the piston no matter what the engine speed. I think that's it!


It is deceptively simple device and works with very few parts. The arm on the contact breaker points rests against the central cam on the advancer and this causes the points to open and shut at as the motor turns.

ACtC-3c256xt0TtfidLviGb3EZot1FFREKX21Gd0nowGHyPWee3f3QzIWNxDSM9H2tTkg5fVfCX4VhrbfP_SFL_gb_EvLHv34ZGxrBvjx6V0WiFyGbMpvsF094wyfrKIchrqgAG-sFp0Ny_xFg-aq068qscn0Q=w960-h720-no


Two weighted arms are held against the cam by springs and as the engine speeds up the weights are moved outwards by centrifugal force, turning the position of the cam so that it brings forward the time at which the points open.


So far as I can tell from reading there is not much that can go wrong with the spark advancer, other than it can get gummed up with old grease and - per this thread - the springs may stretch. No parts are available from Honda, so unless you can find springs of exactly the same length and weight you will have to replace the whole mechanism.

ACtC-3eQ1bvM7aqzzhK0xXpqFEjAKt0YypgjdSabuHTe8Dx1imjYOdsm4qGrEbcYH9ZGXWRg9jTqG71HbJk6aaCrkMXG6C5Ml_lSyyCQQ5JBttD-PCRstBXFFQ5rm_gAdWTB9WmH5wxr_KNqbfC4qOF2Tb1YNQ=w960-h719-no

There is not much to say about getting them back in working order - clean and check for damage or rough surfaces on the cam (which can wear the heel on the points prematurely) and then re-grease the inside of the cam.


One thing to note is that the cam can go on the spindle upside down - there is a notch on the cam and backing plate to show you which way round it goes:


ACtC-3cac-ee6CfPJgJbSdQLAkd71Goycww6tNZzUzEutWdbd4ze9rQo2iORqvnwb8ja6nsEK7CWneWEM19JmMDNg-2hyQUg33xaztKvCBhl1t1ap0nQS7G6j1QbGCBlaz_bI50lMrS9Q0iMMeyrMEgFRGw25g=w720-h960-no


Done:


ACtC-3fMJ9H0y58_N6jMVI74MIAJNt6vRRjc7FQayBh6RP4RS4uvmiA3AMzYUFxVKV0mZlbO1-WEwb3iKmjuvt2o7KoWaKVeTAiAeipq_1HgN34aXImQxCN4NhVh-ppTzPevroBVZAu_ECqBSwsAhgjISlPGEw=w960-h504-no


One question: the factory manual does not specify what grease to use - I used bearing grease, is that suitable?

I think bearing grease is fine for it, best to use something that won't easily get soft with heat and sling around. I use PJ-1 chain lube, it thickens up and has graphite in it, lasts almost forever.

Tom
 
OIL FILTER

an outstanding job from the oil pump clean-up was to replace the oblong oil filter that fits on the base of the pump. Mine had seen better days and the mesh was torn along two sides so it was not really salvageable.


ACtC-3cIOZTylMVM6cfkOA4AO3lD4brbTQApdmWK609js9rZ1cJ4TuJZrktx_vkFe2CsrMRpNop9CbBmrvyuhd-Kvh15CH083aBjNuQffXdgQZGKzf0pcfZ768ONdx9ZWrRToS19oa8vZvnPqMvjTG60NtdhFg=w960-h712-no


Unfortunately I have not been able to find a replacement anywhere so I have had to improvise. Luckily it turns out that the oil filter from a Honda c90 fits exactly inside the rubber housing of the original filter:
ACtC-3fxhdpnRjWmVoScZX76aMLxaxaY6iBOAJbHKmKtU9vuH2Au_f5gQgWINaJYTGVSXu1zAt3ptbCEOdaiI8TcK5CWpXv77mavKpDI54ewNAQIAZFCn4fh2h7VK01QeA_8j0l94R4fSoMgs6n3ViUy5Yckgw=w960-h695-no


Job done!

ACtC-3fz-ngZS_Jnab4JIBEbRhpjCfHto0Z5aYMGW228gEpxFQLUTIjUXqQhJ1KOzCYhlKXdee-8eElwakAxN53CdhJionDIURfpS-6Yg0gO2Vr8J4du-ic2Og47Rv6Fp9WW71Y1rxs9Xcv_DUqwsYXT80FYXQ=w720-h960-no


[edit to note that the filter is on upside down in this picture - sorry!]
 
last of the electrics stripped - surprisingly all the bulbs still work, including the one in the "sealed beam" headlight, which is a relief.


ACtC-3e_VmqB84KrFByEtKH_spFb0clsb4P4KSMFwrEIQr_TFGgSqugmswEl6JAyXsk9EGHaUpE5dQF6E1uDgebMTufeP1WtrCge4taot4dfuIZJ_kCYeOxoxKKl6QDCSX8XbbzouRr01By65wYYKEVbhd0Tcg=w960-h719-no

out of curiosity I will test the selenium rectifier tomorrow, but I assume it will need replacing (lots of people recommend a modern regulator/rectifier as a good upgrade, so I will have a look into that).

ACtC-3futcs34EIHh3Gp-0CzlP7hWD6GCL9SXNADlidlLXj_BgD35kEgQ1zMwhDuBaUCCIdRH7FDfl7PMxu4NINb4xXRlwhoaNYQ9OyURZK6-bPJy4s9NK5MYcekoAeMhm50rExFHnt7usghnZ8bt6LsDWhUtQ=w720-h960-no


I have also dismantled the rest of the bike, so I am nearing the point where I will have undone every nut, bolt and screw (good news, as it means that the ever increasing list of things that need replacing will finally stop growing!).


ACtC-3cDcG5LHbnrubW0xyMQBOPZFz946Idj1aEc-1WrQpSQb64KV2he5JcTCK1Ol5fs0FOtyEaLW1pEO-KNAfv1Ihq5aEAAPmknoE1zmMnaWWFMkB_yYTYyi4WMnjp4E_rqOHuIA-3mmBhNZpm4Phdw-d4gdg=w960-h720-no


ACtC-3dNQ0a40jkmmYyjB0fJWAYrBxFOfidlhQvr-acuHMKgIWZ3AeGKGl8wNyauoYb900IvmG3CfqfuAQowiJD_kPtyeT14DpUZI5iafJyU6klufs6cPzXI_MI0M-gERXXzIY5wM8P7N_V0nBwc6LzqelPxPQ=w960-h719-no


here is seat - they don't make 'em like that any more!

ACtC-3d5-bKvC8jQvQkctFWHK22km8oij_j1-Ro78CHjveOxH19NWDw2lPkw9OLhe3HQqhFh6QzrHBHIq1vIpJFBqBmNl1ZbPdZWn8cjfG00efhgd3F4Zl7WrQy1QWak3tH1Vi6vjvAGu9Z5EnXvQwEmahEXiQ=w720-h960-no


I hope tomorrow I'll have time to look at the suspension. These bushings look like they may be a pain to remove. Is there any need to replace them if they are undamaged and the inner bushing does not wiggle?
 
I answered my own question about the shock absorbers: what I thought was a single glued rubber and metal bushing at the top of the shock actually 4 separate parts and easy to remove. I need to work out a way to compress the spring before I do anything else so, in the meantime, I cleaned up the switch gear.


The connectors and brass contacts needed cleaning and I replaced a broken spring in the light switch mechanism so it all moves freely now.

ACtC-3dliCXzuozpXmveZHMcwbtbRIztzqN-39y5mPghTdpsBaCPDSfLa7LoaYG6sQzRnI3gXNgmzu4hVxbsxTqxqZhhLWi8QK-sOx4vM6LdEDfUGVPUCnS5SQYoZoydAdoXTygsupbl2K9QsNnEzVrNvaWTpg=w720-h960-no


lights


ACtC-3dMnpZh6xruV2_w7mF7bf_A8TLhjq4hyFGsPvNRtBYiwmK0D8IlXVTWPTucHKpuWxZxLt9lM6cUlpyRiR5ECAvd6dVVRJt5egqEGGod2AroB1VyyWho68IQaU1LgE7sCgJVZ1KL4eom84dNyR3x8nhFhQ=w720-h960-no


horn

ACtC-3fbVSjpIWfjqi1rGf1e5hWuVjHFsn44dtoa8CmKxxNKpWI7xFTCLhcPp4qdw_x_60HhAgNJd1Iwv2HzQ_rVD7XeEGSTDgdFX8E870T09WnLvKDIpPlToTBL5TLvgNoHy8Y0uYV4fp-CJlJuWEE8QRiIuQ=w720-h960-no


one of the bullet connectors is missing and there are two different sizes of connector on this bike so I am not sure what to look for in the way of a correct replacement. I will ask on the board that covers electrics.


One thing to note is that the 5mm screws on the switch gear that hold the top and bottom parts of the switch cases (all bar one of which are missing on mine) conform to the pre-1967 JIS standards and have a pitch of 0.9mm rather than 0.8mm that is used today. You can still get the older pitch screws from Honda.

HT member Sonreir owns Vintage Connections, they have everything you need for your wiring.

Tom

nebraska said:
Hi Nick,
I rode a '65 CA95 in 1966. It was a hand-me-down from my brother when he moved up to a new CL77. We still see them around at vintage events today and people will mention that they know someone who has on sitting around somewhere. Some engine parts from the old 125 twins may be the same as the 150.


Here is a UK site that has some Honda Common Manuals that deal with electrics, carbs, and mechanics that may help to explain how these components work on a Honda.
The Honda XL 250K3 Maybe you live close enough to visit this guy.


The advance mechanism for the ignition main purpose is to retard the timing enough to make starting easier. The way to set the ignition timing to compensate for weak springs is to lock the points cam to full advance (insert a washer with a larger enough hole to rest against the cam only; between it and the bolt) and static time it to the full advance marks on the stator. Except for very low rpm's the motor runs with the ignition timing at full advance the remainder of the time.


I'm very impressed with what you've with what you had to work with in the motor.


Mark

the-chauffeur said:
One thing to note is that the 5mm screws on the switch gear that hold the top and bottom parts of the switch cases (all bar one of which are missing on mine) conform to the pre-1967 JIS standards and have a pitch of 0.9mm rather than 0.8mm that is used today. You can still get the older pitch screws from Honda.
IIRC that's the same pitch as the three screws that hold the petcock onto the tank . . . don't lose them.
And I strongly suggest you test the petcock before you put it anywhere near a freshly painted frame. Even with all new internals, mine leaked - not much, but enough. I suspect the modern replacement parts are pattern and not very close ones at that. I've ended up ordering a replacement petcock for the CA77 which, whilst nowhere near as attractive as the original, won't leak. The original will stay with the bike, just not on it . . .


Loose advancer springs aren't so much of an issue if they've lost tension at the same rate. Cutting them down and stretching them a little can restore them to a decent working state. Problems - at least at idle - will be really noticeable when you've got one that's weakened way beyond the other, and balancing them up can take some trial and error. Just think yourself lucky that the springs are on the advancer . . . the CA77's have the springs mounted directly on the cam sprocket . . .

Rayfromtheuk said:
Hi Nick
See you are doing a lot of work on this bike.
Whereabouts in the UK are you?
I had a c92 Benley 125 tourer when when I was 17 and I had one for a few years and sold it about 3 years ago.
I also have a 63 CA 95. I wrote to the VJMC who confirmed it was an early one and only a few on the UK.
I was going to turn it into a real American style tourer special but alas bombers got in the way and time ran out. I gave this to a friend of mine who I think still rides it.
I did have a lot of spares for both but think most have gone now. I may still have a NOS silencer.
My interest was caught by the single point arrangement as I am working on an old Honda restoration that had single point on a 360 degree engine.
I had forgotten the C95 had a similar set up. Would be interested in any help that gets mine set up to run.
My mechanic friend retired before we could get this sorted.
Ray

thanks for the tips and the links chaps, and Ray I liven in Hertfordshire. Funnily enough I was looking at my exhaust earlier today and wondering what to do about it (hole on one side and both sides a bit battered).
 
SPEEDO GEAR BOX

To take my mind off what looked like an another problem, I had a look at the speedo gear box.


There are two oil seals, neither of which are mentioned in the parts book: the one that fits above the ring gear is 48mm OD x 34mm ID x 6.5mm and I was able to order a replacement from Simply Bearings in the UK.


The larger one seals the outside edge of the box against the wheel-mounted cover that contains two notches to drive the inner ring gear. Not sure you could easily get a replacement for that one .


ACtC-3eZYZ1Kmw39TPi7QnlNoDeFtF8-ZK9cygjOQviw9E0B5dDkwKGoKfPOoNaQU5DBUBaX2YSY2FLIf07jnY3nQcTwB3LFmq10GzygQk6rBZbbO-kPOLdIhFYpduRLa7MsxtqnQ9Sni79wWRUhZln95SV6Kg=w960-h719-no


The ring gear is held on by a very fiddly circlip. Once the ring gear is out of the way you can remove the pinion gear.


The brass cap and pinion gear can be knocked out by tapping on the notched end of the pinion gear visible at the end the cable screws in to. Note that there is a tiny grub* screw holding the brass cap in place. Once the cap is removed, the pinion gear and the cap can be knocked through from the other side.


ACtC-3f2HWttUO05g9Is3CrBbKa8GzztbFgKlEd9IpMUT_kvVbvV0WNWjBYvsANqi-Vf-u6eciwocKxq1ibOL_E4dRQeIiJRt70nSVynJoxJOo4Y8fQWHhYuVstcuhRpkbTM0I4oEGXBWIR4sbOGlOpbaITvwg=w960-h776-no


After checking the thrust washers were still in tact and throughly clearing out all the old grease, I promptly dropped it on the (concrete) garage floor, breaking part of the aluminium case off. JB Weld to the rescue!


ACtC-3fwvgidUnGDMtYUhQkExqNh_HYQZrQaQdyEwaNcUDorCUC9ngWqwMzG60dQnvGUva3-bEy1HaWeyzJPQf0eIXxnmOkdqzoIwu_P4niKBiLr0EyZKbvFAIte1SndrNWkxBe2TelSfIuU6Y19Ojw-HqVmvQ=w720-h960-no

After a bit of sanding on the repair and refilling with grease, it now spins freely.


ACtC-3eyeOTms471r4_qAljShkfWWBoUBnKIkpA99juW_KWtndHNmlGHY8ckWlNkBaz6N4yzcNbZGctbzngGN6-4coCWzRnEHjCmuJBF9NDFEnoVJrZsBxQu2GVs_o93yyUbN--1C6fhNYNqpWcUj4gVsWGoiA=w960-h719-no


*PS I now know that a "grub screw" is called a "set screw" in the US thanks to the site Mark linked to above, which contains a handy UK/US dictionary.
 
Suspension links

ACtC-3dOPUGkQEw-WJQXl4bWkx_6pOphUg37IHUDdKUYlroR0zz9K5B1ZJv8L46q3ZDBk42FIQU5mmPNWg3h3E1JOAKW9fV5zGG7qkal0yQQx35Yrf-cE1MgECbk734K976jTMyzOxTjPG9QbhgOC_r71xHChQ=w720-h960-no


here are the bits:

ACtC-3c6vbiwMeYo5bqrf96Pc2WqGOGTFQ4PfCH9JONQ7xpFY_qMZVR_5v0V9SU6qA2_VrSd4cKfrft6gsyyN-yXHRmBB2KyTytXr9aQCRaUddLaSni7vMsg2EvUAOLjyeffkEShGoobxvC7KZqQpL3w9dlc6A=w960-h791-no


there is a bit of play in between the hard plastic outer bushing and the metal inner bushing on the central pivot point so ideally I would replace them, however, the only place I can find these parts is CMS and they are gob-smackingly expensive, so I will see how the originals fair.


I managed to stretch some after market dust seals to fit (these were from a C90 kit - they did not fit the c90 either) so that saved a few quid:


ACtC-3fU6qdxaPurVrojwvxHoJhcbWl478wLFC0jjJDTrCONVSChF4U1T2xeOzUIT5o8TXVVp5iyW0KMJcUF4bwbCfsQMk-lGfrkx0xGtaGSGl2oLg1c6iWJoG5awHez-K9LFLeBAZdVP7jiMD9Ta-ADKNpNMg=w720-h960-no


A spring had popped out of the back of one of the grease nipples so I replaced them both. They are easy to remove if you get a firm grip with pliers and apply a bit of heat (although they are likely to be damaged by the pliers).


You need something to fit over the top of the new nipple that is small enough to sit on the rim so you can tap it home - I used an old acorn nut.

ACtC-3c3v2YZXdDdAD23xWzrt1hZi8jzdZ-WFQkgLs1BHTLc8vXBlHm33wolQVEOPpswMyJHuHe94kbJNJuecYDWJtZMQIJYGGTBOZ19985kzwby6q_mD3SWFsGbrKNQpkRMXaiQGY6ZgHbTTnd1E463KXyXyQ=w720-h960-no


make sure to align the holes in the plastic bushings with the hole underneath the grease nipples when you reinsert them

ACtC-3f4Lvnt6Na6uQYmFwdDIGKRGWexR5oENE53O8LfYPapjPPtFPC0a8JA-efhJXJNSU6V8as2qS2ZwChiLAAjmOEE4Jl-dq5pc114mYqL52H7oTozk55rOPGPggYFPPCVzUt0r8rHGhdUBU-ZLT48WCVeag=w960-h727-no


done:
ACtC-3euipSO6Y6h1yhojy2V1mjWofOjnEULDIfSZ4V8VByQeNh5jrlJ8SmjdMOf2IpvrcX2u_KpwDu9Kk3ggOJDeKIEpIN-0kHtYd3AQ3sRbLgOf54zA0FKGoErvagIiknoD5BjwDWcgUBY8FHop7ImAlo-fA=w960-h720-no


nebraska said:
Nick,
I'm sorry I forgot some important information in my post # 55...


"The advance mechanism for the ignition main purpose is to retard the timing enough to make starting easier. The way to set the ignition timing to compensate for weak springs is to lock the points cam to full advance (insert a washer with a larger enough hole to rest against the cam only; between it and the bolt) and static time it to the full advance marks on the stator. Except for very low rpm's the motor runs with the ignition timing at full advance the remainder of the time."


I should have added that after completing the static timing, you need to return the spark advancer to normal operation by removing whatever you used to lock the advancer cam in the full advance position.


You can dynamically time the engine to full advance simply by increasing the engine speed so that the timing light indicates that the spark advance has reached its full advance limit. At this point the timing light should show that the motor is firing between the two advance timing marks on the stator if the timing is correct; if it does not, then rotate the points plate in whatever direction it takes to have the ignition firing between the two full advance marks. That is the purpose of those marks and don't worry that when you let the engine rpm's drop back to idle it's not firing at "F" at idle( How much riding do you do at idle?). My brother learned this method of ignition timing at a Honda Factory Mechanic School back in 1967.


Since the spark advance mechanism is against the stops, the condition of the springs can't affect the full advance timing. Try it and if you are not satisfied, just static time the engine like you normally would.


How many of us adjust their points type ignition timing dynamically and at full advance?


Mark

thanks Mark that is good to know.
 
OIL FILTER

annoyingly, one of the screws was mangled on the oil filter. I managed to get it out by drilling off the head and using my indispensable Eclipse slotting tool to cut a slot in the remaining thread so I could edge it out.


Here is the Eclipse 4S set - I am not sure if they were ever sold in the US? They still come up frequently on ebay in the UK and are very handy:

ACtC-3fvZkcI_NI3QazbxCwhgr_ahSFki7J-C_1b-6i4gEaxR2Na-1hF8619Qbb9qQ_znmcOMxftn5y9RZpHLAPgyf39nWnOMjX32dvXto692C7UIW_N5GmfGudwp8sG11jyuvVDVEqw3RcbSQcHg6MAQAfGzQ=w960-h705-no

the oil filter works by spinning the oil so that any large particles are forced to the side by centrifugal force - you can see how effective it is by the thick walll of gunge glued to the side of the filter.


ACtC-3ereThuoTCo7kAZKSqKJ7nfOlE1G1I3VU-B3zUkt-XSIYZ88_JtTncqzAy69Lqjqmuw4r-89baGBTldRhiBtsgvdySVoPPxPgozU3eg_1O9mceumyeUzz7lx970j4ukyBh5YzoVKwEQMY07KyJDVL9nCA=w720-h960-no

As we saw earlier on there is a further filter on the oil pump, testimony to how much effort Honda were putting into making sure their motorbikes were reliable.


A clean up, a new o-ring and done. Now I just have to find a replacement screw (possibly challenging since it is another screw that predates the ISOification of the fixings used by Honda (it is 4m and has a 0.75 pitch thread rather than 0.7)
ACtC-3e-TvCYQ6F6D1GmIo5uQ-6nbO_N7aNY8BCEvODv24TC2YB8Fo7rL8be3w1qBC2RtgYj18soKU2w1hfDHY8beVIv0uwn9Pro6a7xkSP0EerxldELmt3KeYOGU08FCp6Hd-78Ii-iAxQLjzkBT8XWgRkQDw=w720-h960-no
 
Tyres

After a lot of fannying around I got the tyres (tires) off. From what I have read, Honda fitted Ohtsu whitewall tyres in the 1960s so I think it is a fair chance that these are original from the factory. The inner tubes - unpatched and partly inflated! - where made by Ohtsu also. Who knows, perhaps they contained 60 year old air :)

ACtC-3fcC95aVmUv2_Q3jGv_r2ioKdEbo-dGE2mfWvwbFuBGG6BhY0dkK1MRjGKY_fTEVFGS2vM7DIxbrFCxGwR-ham3d61ZVyA2jgi4W6CoWztFpOYu9EZ77-c_x77ohYMVg2di7JSMH7VLd4u5_Z9PokMLmA=w960-h719-no


ACtC-3eYFFgRJz5lmsUi-4s5qrD5tP_7TH6WkczDUFasQvV_YkJShERVf-Yht43Oty8jk2SHsdzbTEeiINYubKUXojTqjCYTuH2VvWFD8sugRx02sxo60Rrkmq5S0YQPnqWDDC-zbrIjCY9OrLf2EWi-1RTPBA=w960-h931-no


ACtC-3fwtQZDR3VO6d4pZ93XA67WDnetOoijodlwuFQYJrOElVMmITpE50pzNS1IvB5SUOY60Cbzn-Clxi3uiMS0CP8vhA_z7eibI-iILyacXuwb-kjF4CRxwyxrDqV9okdyMhC6qGw8Zm8fr1TVEcmBNLJOGA=w960-h872-no


Needless to say they are a little worse for wear:

ACtC-3dfS-bUIlZjbfep-A_WdvOu00tWrlwRppBsAJB1v28_45iQN3cs1wPF3BsWlrPIKtJCNmSFhS49rK_k_dYCmwnRyjxBfkOdc9UPb4W-Tn7X7YTRXRvbz6ied-dcYnw21KijTMduB8c4uoTok99f4Z9tMQ=w720-h960-no


The size is 300x16x4 which seems to be an unusual size, although I have found some shops selling 3.25 x 16 which is the size I see other people use. I will do a bit more research before putting in an order.


Incidentally, there is a US firm that does whitewall tyres that would fit, but unfortunately they are in the wrong country (and a bit pricey!) for me.

ancientdad said:
Almost worth keeping one of the tires with tube for conversation pieces in the garage... not something you see often, particularly the Ohtsu brand
 
I have kept the old tyres, as it happens :)


I've just ordered a set of Heidenau k31s. Several people on this forum like them and they are used by longdistancerider which is good enough for me!


They also do the correct 3.00-16 tyre and publish their specs which say they are good for the 1.85'' rims on the CA95.
Finally, the thread pattern has a vintage feel, although I think the Metzeler Block C are a closer match to the originals (but I could not find them in the 3.00-16 size). Here is the Hendenau:


ACtC-3cF5mmwsbJMTj3XulLMt8lUvlB9cXTAnpEI4DLwjA27-ExoO0WKc-HCnZTJqRFA5y6F4r2ykS_67ht3u57lWWtj5q-k0N-y5OgxiydMQ5AQ9pmfioWEbir0YaGEridMiNi83LR0BA9cvYjjgjvOJr1Dfg=w824-h960-no


metzeler block c:

ACtC-3cDCKr3qRl8MAF40AgXnq0jp-Qz_Kcz_bpX1RpJHAXuJtlj2ODzag-GdmPGGVnI6PiDYm0A2hFgBbY9sVw7iysgj3UlHoF_8eiWOycjH_49LIPk6pyILB0s1Miv-9lhbxeJ1W-Y_YTkYjuEsxN19vuUkg=s500-no


originals
ACtC-3eRi61HIxpAfPywVfPmT-yzDnNbejpk-COL_wKycWOdMTv-5XRgMwYnidn3C3CdxMKE2Du5pcsXTiIqvjs9BN147XKH4UbCpIX5aRZsH7-hfjvUwE7vEpQVnDZ0BE8fXPhxTTQsCAmcTZAN__iY__8v0A=w720-h960-no


The tyres were £45 each and I got heavy duty Michelin Junior Motocross tubes (90/100-16) and rim tapes for £25, so all in just over one hundred pounds, which I think is very reasonable.

ancientdad said:
I'm sure the manufacturer is not around anymore, but my Dad bought these for the CA72 he refurbished back in 1969. The scanned photograph blurs it together, but the tires were called "checker sports" and the whitewall was like a checkered flag pattern
ACtC-3d-ROxQ1TsbEABNqz8Kn00Pg-rZfbs2bRaoYhuJz_nfsqQDclqfxVLoUij682ouul87EbGeH6IPuiRzvqM1_R0L_eDFuDFitR1BxAtJghX_q3LRJyvkEE7e0hacMnfCsucUxeLfNVnfGsZkBHkOYN3D6w=w960-h677-no
 
that is very cool Tom.


One job I had not yet got round to was to make a replacement for the metal bit that connects the carburettor intake and the rubber tube on the air filter (I've no idea what it is called - a funnel?)


This is what it should look like:


ACtC-3fJNoKYxGsDaspuGtK5TmgKo14IWiSIxA07OGxMhpjb7rrtKzTvinHwCjZvnGjlQRSqCuVGZrXDK7cDdG229NExBbWhL5S_syl_3I-WlOFrPuozIBwo2mw9KVKymQk9HJ3ywFfCCY4JRVK1CbyPCKJ0Ww=w512-h382-no


and here is my effort


ACtC-3fGnMD0RxfBwHNZkzbwQETkyOmgE7SFVmLJn9HA3DF8_7TcArkzF_KNO9XUToJwUM4uBw_dz0QHwVvRaDx9Bua0S3UL0B9MYfpB4RMkImOO-RcTXlXcHniIULYIHuJ5awhdl8As1sw6E9zds93pu6bjtA=w960-h720-no

I used an exhaust reducer (not my idea, I should add, I think I read it somewhere on this forum).


In the unlikely event anyone needs to do the same, I got the reducer from here. I got a couple since I was not sure what would be the best fit - it turned out that that the 41.28mm (1" 5/8) OD to 31.75mm (1" 1/4) ID was an good* fit.


You just need to cut it down to size and drill/tap a hole to take a retaining screw - the massive screw head I have used is what I think architects call an 'honest repair'!


* the fit is tight but not what I would call air-tight (you can still see light round the edge) - does this matter?

66sprint said:
I would run a thin bead of clear RTV or silicone around the carb bell (or some form of gasket) before installing the adapter otherwise it will be sucking in unfiltered air through the airspace gap.........
Excellent work BTW........:)

got it thanks, a couple of turns of PTFE tape and there is now a good seal.
 
RIMS

not as bad as I feared: a bit of rust on the inside of the rims, but - after a good squirt of PlusGas releasing fluid - all the spoke nipples turned freely.


Here are the untreated rims - the worst part is around the valve opening, although it is not quite as a bad as it appears in the picture:


ACtC-3dQVsM6P6BLnpSWgMqFNA41gBsmpAvCj1BCrRR2lMchf2jm37Z8DBXEMmosx2uYvcgInRIHbqRRWEQnlF5oaDcY1cRL9wNEMVJ5DWqPUTEo0f16zjnixUUvkg-fOEePS6EXXUr90YH5iXgw63yewoowZw=w896-h960-no


ACtC-3f8vGMSJPBsu9zyZuLCx30L6v89Y5I7p-DXESbBhZ-aMLtfKleG1tajPQI7vtKrkNsaWINxkfwbmuTcUvz_7DVbftyjlkPNIeUM7U18BZLP5nG3PVq7udzZs7YH_fAmYWgmGuUkhJzIZ9_v2zzotFhdKg=w720-h960-no


I scraped and sanded off the worst of the rust and treated the rims with Hydrate 80. This reacts with the rust to form a hard smooth purple/black coating that stabilises the rust and will hopefully slow down new rust in future.


ACtC-3dCcVkSbyyMUiupHbF9--9SCTCZqEBmHexlgKWrKTQ9DVtkDtEFn3LFV27w2GeH-uyyZcUj_KW2Y1lhJGYxZtAERh5-3inqQ6ScSkX8rp91a4XNiQtIUYrzkiOhN6mhoUQ2blWexkqAARzSgIkcGLEgnQ=w960-h719-no


the DID rims are pretty substantial so I am not worried that the rust is deep enough to have done any structural harm. The next job is to replace the hub and sprocket bearings and then to check the spokes and true the wheels.
 
WHEEL BEARINGS

The original wheel bearings were made by Koyo and the one behind the chain sprocket is by NSK. If the mileage is to believed, this bike has not been ridden much there was probably nothing wrong with them that a good clean and re-grease would not fix, but the replacements are cheap so I changed them just to be on the safe side.


The bearings are standard sizes and can be got from any bearing supplier. The sizes for the 1963 CA95 are:

  • rear wheel: x2 6202 (15x35x11mm)a
  • front wheel: x2 6302 (15x42x13mm)
  • sprocket: 6005 (25x47x12mm)
You might as well get the replacements from a well known brand, since the total cost difference to unnamed brands will only amount to a few pounds/dollars. There are lots of different makers: Nachi, Koyo, NSK and SKF all seem well regarded.


Wheel spacers and original (right) + replacement bearings (left):
ACtC-3c8w5lJyIQIsXoijI0nyeGJeKEy4oYG3imHlDK8NNd35W569Wp  V32kMiCpNRIknrVRKpjRk90e1GtiXvRF-Q6_B9UyUWBganHJpV5ZHH1ImkQ_qfSO4JsYJf802dm43qN9piu  Q9O7Nt1stNFe7UaKdoxA=w960-h720-no


interestingly the original front wheel bearings are sealed on one side. I read that Honda did this because it was possible for the heat from the brakes to melt the bearing grease so it might leak past the seal. By leaving the inner seal off this allows grease in the hub to constantly lubricate the bearing, whereas it might otherwise leak out from behind the seal and never be replenished. I have also read that things have moved on and modern sealed bearings/grease can be relied upon to last for years.


I am not sure what might have changed in bearing technology, perhaps the rubber covered metal seals used today prevent leaks better? Since I don't know for sure, I prised off one of the inner rubber seals so they could be installed like they were at the factory.


There is not much to know about removing the old bearings: a bit of gentle heat (some people wrap the hub in a towel and poor on boiling water, because it is possible to warp the hub with too much heat from a blow torch):

ACtC-3el4T6cY2w2AejgiGt2yCPZJBpWzODzwId0OcmKboNb4_b8-QM7AdsHLoFBsG8dUX0GJCu1qhNwuHws0__vEKrpWJcwFeuWSfm  I1aiORv_uWaDLb5qdeN5Wg5i_6i8d44V7qXBl5WUzs2JB6Tvq9  t6cEQ=w720-h960-no


When the hub is warm you can insert a drift from the opposite side and - once you find the inside edge of the bearing - you can then gradually tap it out. This might damage the bearing so, if you really need to reuse it, you can also try and get the drift on the edge of the spacer in the hub and tap that instead.


I applied a bit of heat again to install the new bearings and I also put the bearings in the freezer and this made a surprising difference, with a couple of them slipping straight in without any assistance. For the tighter bearings I tapped on an appropriately sized upturned socket to spread the impact evenly over the the inner and outer races to reduce the possibility of damaging them.


According to the manual the hub should be filled a 1/3rd full of grease. Finally replace the oil seals and the hubs are all done. This was the last of the really dirty jobs on this bike, which is a bit of a relief :)


ACtC-3dN5cbydOv71a7BKygZkwceikDwUti0teAonngxnMe1FrefpfI  H0zwWsXSCDPtmX_0MYWNY0YymHjJFN6T5s-sxsN_0LEMxPILZ8h4TfCf0HgOhGULscHjynS_y7-at3hRGjfB5vpG6aaW2vUZ62EsvPw=w960-h719-no


Incidentally I saw a good tip on bearing removal, but did not have a rawl bolt to try it:

 
TRUING THE WHEELS

I have very little experience with wheel building, but what I have learned is that it is possible to do an acceptable job - even when you don't really know what you are doing - so long as you are patient and work with decent parts to start with.


Luckily there were no signs of any damage to the rims, and - although many of the spokes were loose - they were all straight and in one piece, so it did not take too long to get the rims reasonably straight. The basic idea is to get all the spokes done up tightish at first (you can tap them with the spanner to look for the spokes that are too loose) and then to look for areas where the rim is out of true and make small adjustments.


I already had a wheel balancing jig ( a bargain at £29!) which is very convenient when doing this job as it has a pointer that you can put close to the rim to help see for where it is out of true. Once you find a "bulge" you pull the rim flat by tightening the two spokes that straddle the bulge on the opposite side. A bit hard to explain but obvious when you are doing it :)


ACtC-3fSkb0ujkbM1BNTsQ0KbgZbMgiciQLI0hh520naA9PzUk9rSao  Ti2H4BSDHHmGmaNb3vyl-GG3f-fZVUErPJOaZC4Jbz6OelrQWbrVL2nw6QeRtfNJDFg4qzlH7RuM  CQGHddPez7CcoGo-hRxmACDqvLA=w720-h960-no


According to the manual the allowed run-out on the rim is a generous sounding 2-3mm. I think I got them both better than that so at this point I am leaving them well alone, for fear of making them worse.

 
Brake shoes

There was very little sign of wear on the original ASK brake shoes, but there seems to be near universal agreement that it is not a good idea to reuse old brake parts and, given the potential consequences of them going wrong, it is not hard to see why.

ACtC-3dRz_UY0qBf75VyY_n2hOWcrhv2dxYP2PDcqIiKTAF0jvDQlcnHI2YbBiSzqlfEIL8wawCZ0su7g5mivujuU3eENWTyz_OBrBemLEeaqqeUoNQ-9gdElEynuZ6THav6RMJOlF2DU_DJ6ijJMCxGIfBZ2g=w960-h719-no


I was not expecting any problems getting replacement brake shoes, having blithely assumed that someone would make an aftermarket replacement for the CA95, the world's favourite Honda twin!


A bit of hapless googling confirmed I was wrong, but then luckily for me a few days later some NOS Vesrah shoes turned up on ebay: £50 for two pairs, delivered. Bingo! It is hard to tell how old they are as there is no date on the package, although the price (£8.95) written in marker pen might be a clue - 1980s?


ACtC-3es4l5OZtXMMTS-TpYgIVhs_kFYpjXgYe7gR5bAIKalAABKLWe2vGQf-1vF52lUGokHKkIUd76AZxwukRDWzUn1C84biOIprrrnV5jmRbLncB6pw3hcACwKvmvq6RkVrkRYYpX_mwO0pOEbnrJMpH-m8A=w720-h960-no


ACtC-3c1CjFXHrD6uirL2815y5waJPjlThrIx_TNrpmh7f176-gKwM0d97AeYi4Z5Si6h8YV9JIcteowFfVtpm-Ucjz2Axwdd0py87G75gjQnr4eC302imCwVG04JUs4eOCIXlD5blG1h-jryPS-DBrsxuh0YA=w719-h960-no

I was very pleased about all this until I started reading about the frightening prospect of old brake shoes delaminating while in use and potentially locking the wheel. Opinions seem to be mixed about the cause, with some people putting it down to glue failure and others suggesting it is due to water ingress. So now I have a dillema: I have what look like perfectly good brake shoes, but I now also know there is a small chance they might come apart, and there is no obvious source of a new replacement.


I have found a potential alternative from EBC (model S605) which are the same size - 150x28mm - and available new, and have managed to get a trial set for £10. Hopefully they will be an exact fit, if not I will have to decide whether to use the Vesrahs, or perhaps look at the option of getting the old Honda shoes relined (I had not realised this was an option, but have now read on the forum that it is not unusual to do this). I wish I hadn't read about delaminating brake shoes :(


ACtC-3fhwdf4JKREeNYp4a9-Ebf1YjRQczBYbhWxXDL933uH-gK6CNBJnYFfEYm7a0GNTFAAovNJFuzSs5SxY_JMaFIuVNO66YqUv3wh8mu6PqaN2DNntX1i81gOkmbjiZoOa2H9euERKmII7DJ9Vef3LeUYEQ=w719-h960-no
 

Attachments

  • download - 2020-06-07T204737.852.jpg
    download - 2020-06-07T204737.852.jpg
    158.7 KB · Views: 3
sadly the EBC shoes are not an exact fit (the semi circular cutouts that fit over the pivot point in the hub are set closer to the centre of the hub than the originals). I don't think it would be a good idea to try and modify them to fit so will be sticking with the Vesrah brake shoes.


Please note this does not reflect badly on EBC: the shoes are not advertised as being compatible with the CA95, I was just gambling they might fit.


If I was doing this again I think I would plan on resurfacing the original honda ones. You live and learn!


ACtC-3c-XJgdMKXSPIKQonV7nV2klyXTvZAJwZ0bXsU6rfFMw78KVUlSvRH2Qc5gxdqrljVeTJMnkAmcrdYRbtXMHuuFfQF-LUD5RG6eMGtEYaqKVZn4uyp5s_gvFeeKsxM7_DcDNKXCPsDI0JoNrlsAuUhq-Q=w960-h719-no


ACtC-3ciwjJSVgNMwdJJOXL_C5HSkx9yjhDIwbso3tBvVqjKO03qRk5GSEc1hKa56S-WQCPgw8S6Bftf6TvFau0D00aXCQqxEpD_DT2La4oeWzUi2dYtrFm5MsUfilW7kPcKHvQg2Bo9Hr_DUndC_2Xcmy3nrQ=w960-h750-no


A new thing I learned about ill fitting brake shoes (which is to say shoes that rub, rather than shoes that do not fit at all) from this forum is you can finesse the shape before fitting them.


The idea is you lay some sandpaper on the inside edge of the hub (rough side up) and then rub each of the shoes against the sandpaper so they are shaped to exactly fit the curve of the hub. Apparently this can avoid some bedding in time and, if the shoes are a such a tight fit they are hard to get into the hub, can help with installation.


I'm afraid I did not bookmark the link to the post that illustrates this and can no longer find it - sorry about that!
 
it took me over an hour to fit the tyres, largely due to incompetence, but I was also hindered by the very thick motor cross inner tubes I used (well that is my excuse anyway). The second tyre went on much easier when I remembered the trick is to try and keep the part of the tyre that is mounted on the rim located as close to the centre of the rim as possible (e.g by kneeling on it) as this means the remainder has less far to stretch.


There are no direction markers on the tyres but the tread pattern is directional. I am not sure if it matters but I put the one on the rear with the sharp end of the "chevron" shape made by the tread pointing towards the front of the bike and did the front wheel the other way round. Have I done it right? I hope so (see above about my ham-fisted tyre fitting abilities)


I was delighted to discover that what we call rim tapes in the UK are called "flaps" in the US since this is slang in the UK for a ladies naught bits. I am afraid I found this very amusing.


inner tube and flaps!

ACtC-3dz-KFG5sEo28_Yu6J8GmpUf6keTvdpoJFm3Y2XU81i39Oh0cybBRS8BT6NJMD50nIxVUI6nKnqliAIhKRv0L2XxHhHRyKj0NEmLJoIkqEWWn3113yDqEEt-1xuCCnO_izt54Lpty-Qogb5AzTUkQTbcw=w960-h719-no


tyres!


ACtC-3d732NRUy9OGoJX-R3O6fMu1ImUlv6GX66niw6rzun4LSVOYDJKQl_OdB-HexfoU004-YrAk07AokVApf2tWptPoSDL4JrJVjCc7t7AFYDUP_ownw8flXWnDXU1p3PO9Cx5plAn52gZkStq_NizcXKArQ=w960-h719-no
 
a few of the bits I have been waiting for have arrived.


With help from 66Sprint I am now ready to get the cylinder rebored. My only lingering concern is whether I have the right piston oversize: I purchased 0.25mm over and now - having spoken to the engineering firm - I realise that if I'd got a larger oversize it would haven give them a bit more to work with in case the cylinder is in worse condition than it appears (I am having to send them off by post, so there was no chance to have them measured first).


You live and learn!


As recommended I replaced the rollers, springs and caps in the starter clutch (and learned a new term in the process: 'staking' where you use a punch to deform the screw head so it interferes with a gap below to reduce the chance of it coming loose).
ACtC-3dxgA_cayza_gnPDmJ6WGejFAoe-z_2AOYqkB5dMmmrSar9jInXjVmRmSb7dKOPhdhkVXzllunHyk5KRpXAbf-U503eg-hEJ82I_Mvm5QkJ25_7wmPAr_BGNaN_vHB0S3zoCsTm2qDwHbGRNaO7bVsj0g=w960-h720-no


ACtC-3cjVr9-aO_GBwUMFplWot2e1zrQkBcQ7YZSbBR2wUQ3VAj49n8bAVfR_fAtI8c0EnN-QeSZj8zMBw16UUamLhBDaArCC2ZTUt0eNn4J5zJlHiMtA3MJ-B82nOfhwGNCFbF4Jlyw3jOrqOV_jYMCu4wqFw=w960-h720-no


Got the remaining bits for the carb including the cap screw and the all important clip to hold the float bowl in place.


ACtC-3c3NEg0ytN1yVqGFvdUNWcXQDvZROcVAk_s_rOpedjvKm756_hthbksTfWKokcOg_Nx026Lt-YWs1OmKtmLvLwFo4kMBm092nhhJSE6PM28H1-1eRIubDV7FQvE5heezPVrV-PyE_SOVbLzt09EZrw3Ig=w720-h960-no


replaced the clutch plates having given them a soak in engine oil first
ACtC-3c7l5mu5SGvrkyagpuSQY469F9TohZ0nT_j8wHc_noIHCC2Eq6l9gnvazoo5hBluUrh4-XVN422xc2qbASqdTpI1Tk1wZI6OjKHnp0MChCd0W0BmjEVuJ3Si2PXyArUQa-DegdehrBvQ0tbVwCIgKbkyg=w960-h719-no


ACtC-3dxzRf2B5ehL1nPmQ04dIP4ggk1IWslHhNmk8QG3-mL12jfZMlcjTRNCkitZvetT4BHx5jA-Ymdh3xOxXbIzCF7z7T2goLN5mg_dGj--oXP1oRHgg-SsJPyYVJYkgBZHegRODOjzohCyDNhYMgHtJZFZQ=w960-h720-no

and finally I treated myself to two new ball bearings for the oil pump. I did a "successful" test by submerging the base of the pump in oil and working the piston so it squirted oil up my arm and on to my shirt.
ACtC-3eSEg-YmtKI9753G3HAIYMAk7163W-vYg_ZKzTAPj4qqYuqLuk2JRfi6ZqqNjjUOzfqk8kGdBpDiPKoxmGPeS_H8B7ul5G-3YSrV3M4Hh2Pk-XORVxIJgbGA_eiQbGRL17ckddgApfoNthTtuD6pXz-mw=w719-h960-no


it is good to have a few parts completely finished. Actually, the end of the engine repairs is in sight - I've just got to send off the cylinder and wait for my 2nd gear selector fork to arrive and it can all go back together :).
 

Attachments

  • download - 2020-06-07T205855.994.jpg
    download - 2020-06-07T205855.994.jpg
    180.6 KB · Views: 2
thanks again to the folks offering advice on this thread, I've managed to sort out the handlebars. As recommended by the-chauffeur the CB72 switch is still available and fits perfectly.


Assuming the one remaining grip on my bike was original then these two rubber grips are a match for the CA95 (and still available): 95011-14100, 95011-14200. The metal throttle tube is no longer made and I eventually managed to get one from a CL160 on ebay. They do seem to be rather rare - I suppose they are easily damaged when bikes are involved in any kind of prang or get knocked over.

ACtC-3fYcpTD9U0WFAwUvK3dQ1Cj0EF4vC_s8BqlSy_b5HUVQuoJApN6AboD6SC17vHp4kOmClkvyUrn2x6loeWGlicgQJCdLSPr0kGVtwjKNGvGKtqETp0ACnAcgVam7FX9loFwOeqM74voyFk7A9V78zL_yg=w720-h960-no


In case it is helpful to someone else who is struggling to find a metal throttle tube, I discovered the plastic tube (95014-51100) - which you can find as a set with the grips mentioned above - can be made to fit with a bit of persuasion: you have to file off about 1 mm from either side of the section that fits inside the switch.

ACtC-3epeGzgR4RuYlwgIOQRCe9o0FzeRvc-cqqkTQkT3G02MKjDOHLdGjIpEd4ADb2ZDS_kB_Hy4DsysAcMrH3BdExW0ilp_x0hVC46wYtokGxMGo-Vz2W3jkftju-OCkAYciXcBZSIRRBEup-65CQEXa5quw=w720-h960-no
 
Back
Top Bottom