How to Rebuild the VB Carburetors

Should I go easy on the seat of the float valve (the bore of it) with 1000 grit sand paper or go with 600? Also the vacuum port, is that the one that leads to outside the carb? Is there any performance/health of carb issue that can be caused from blocking it?

I’ll sand the brass with whatever sandpaper grit you recommend and see if there are any cracks. Will update soon.

Boosted, I’m gonna check today the conditions of the needle and get back to you. From what I remember, it didn't seem to have a groove.
I use 600+ on the float valve bore, fold a little on the bottom of your roll and push in hard to polish the seat taper.
The vacuum port in question lead directly to the engine side of the throttle plate, right side @1/2 way up. I block the valve end, I've used BB's, solder balls and JB Weld with equal results.
The only down side of blocking the air cut valve is the decel afterburn popping. If your mufflers are rotting away you might ruin them. The purpose of those valve is to enrichen the mixture on decel so the exhaust gasses become too rich to burn. If your jetting is right that effect is minimal. Upside is never having to buy the valves again and eliminating a potential vacuum leak when the diaphragm tears with age.
 
Regarding the float needle valve photo - I see the gas line(s) around its rubber tip but I can't see if there is a groove or notch in the rubber that happens with age and with a full float bowl of gas pushing the float up and thus the float needle valve up and holding it in its brass seat of the carb body.
The groove/notch develops as the rubber tip hardens from age, old rubber. If you push on the rubber tip both straight on and push at it from an angle with something that won't cut the rubber AND the rubber tip is still plenty flexible, supposedly you can keep using that float needle valve.
At its other end is a compressible pintle with a tiny spring between the pintle and the body of the float needle - when you push it in does it return itself back out and push in and out without feeling any crud or resistance ?
I don't know the purpose or function of the springed-pintle opposite the pointed rubber tip on these float needle valves, but it must do something or it wouldn't be built into them.
So just inspected them, the spring at the back moves freely, no resistance or feeling of crud. There isn’t a notch on it either and only marking on it is from the gas stain. However, I want to ask, is the entire tip rubber or is it a metal tip with a rubber covering? I don’t know how gentle I should be when trying to flex it, it doesn’t show any signs of cracks or tears either. I compared both needles and they seem exactly same.
 
Last edited:
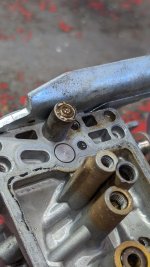
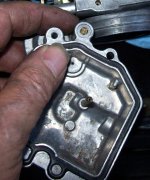
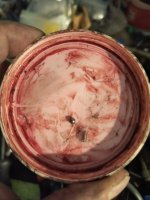
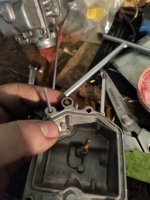
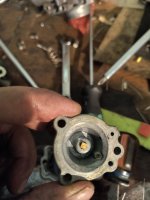
Also, I think I might have found the culprit. I was inspecting the float bowls and I notice the side that was leaking was missing something that connects to the overflow tubes. The side that wasnt leaking did have something (see pics). Is this the issue?889F0D73-7648-4D93-9232-F5A54C32EF49.jpeg

C1056D1A-B9B1-41B7-8440-2001913FE5C8.jpeg


EDIT: Lol I’m an idiot, i just had the drain screw removed 😭. I got too excited thinking i found the issue.
 
Last edited:
You can lightly sand the rubber tip to clean it and check that it actually stops fuel flow.
Those are the stand pipe mentioned earlier, polish them and look for that thin black line
 
Should I go easy on the seat of the float valve (the bore of it) with 1000 grit sand paper or go with 600? Also the vacuum port, is that the one that leads to outside the carb?

I’ll sand the brass with whatever sandpaper grit you recommend and see if there are any cracks.
That float valve seat in the photo looks clean enough without any sanding, but if LDR-Jim disagrees, then sand with only a fine-grit paper like 220 or finer - especially if the float valve needle goes in and out of that brass seat bore easily without grabbing as you pull it out of the bore.

Fine grit only also on the brass overflow standpipe to check for a crack, like 220 or 400 or 600, etc...
 
That float valve seat in the photo looks clean enough without any sanding, but if LDR-Jim disagrees, then sand with only a fine-grit paper like 220 or finer - especially if the float valve needle goes in and out of that brass seat bore easily without grabbing as you pull it out of the bore.

Fine grit only also on the brass overflow standpipe to check for a crack, like 220 or 400 or 600, etc...
Use 600 or higher.
 
That float valve seat in the photo looks clean enough without any sanding, but if LDR-Jim disagrees, then sand with only a fine-grit paper like 220 or finer - especially if the float valve needle goes in and out of that brass seat bore easily without grabbing as you pull it out of the bore.

Fine grit only also on the brass overflow standpipe to check for a crack, like 220 or 400 or 600, etc...
Gotcha, I do want to mention, I am very surprised on how clean these carbs are for being 40 years old and 60K km. I’m just confused on why its leaking through the overflow tube. 600 grit sand paper it is then.
 
Gotcha, I do want to mention, I am very surprised on how clean these carbs are for being 40 years old and 60K km. I’m just confused on why its leaking through the overflow tube. 600 grit sand paper it is then.
The 3 choices for the leak are float level too high, cracked overflow stand pipe and drain screw not sealing.
 
Don't forget crossover tube o rings. I have fixed two sets where it looked like it came from a float bowl but really was it traveling from the crossover tube.
 
Last edited:
Don't forget crossover tube o rings. I have fixed two sets where it looked like it came from a float bowl but really was it traveling from the crossover tube.
Are the crossover tubes the tubes that connect the carbs together? In my situation, I saw all the fuel coming out of the right side of my bikes overflow tubes that were connected to the bowl, could it still be the crossover tube if this is the case?
 
Yes it connects the tubes together. Easy way to check without smelling like gas is just fill a lawn mower gas can with some mineral spirits or alcohol and turn the petcock on and find the leak. If you're splitting the carbs anyways (and you should) just replace those o rings now. Theres a pinned thread in this subforum where I have links to o rings you can order from McMaster-Carr.
 
Are the crossover tubes the tubes that connect the carbs together? In my situation, I saw all the fuel coming out of the right side of my bikes overflow tubes that were connected to the bowl, could it still be the crossover tube if this is the case?
Yes, the (fuel) crossover tubes are the 2 metal tubes between the carb bodies - there's rubber O-rings at their ends, discussed in sticky thread elsewhere.
I think Maraakate misread what you read because fuel dripping out of the (hose)tube(s) attached to the nipples on bottom side of float bowls (overflow tubes) only drips for what LDR-Jim stated:
1) float level too high
2) cracked overflow stand pipe (brass, within float bowl)
3) or drain screw not sealing
 
I've just been testing any bowls that come my way by filling them with mineral spirits or alcohol then I attach a mityvac at the drain tube and put a rubber stopper on the top of the stand pipe. Pump 5 to 10 psi. If bubbles form thats where the leak is. Usually its a hairline crack in the standpipe and honestly sometimes its very hard to see but the mityvac makes it obvious.
 
I disagree on the float height, rather anytime I've seen that its because of the use of aftermarket float valves that don't seal correctly. An easy way to tell is have the float bowls off and hold the float up enough so it is touching the shock pintile and turn the gas on.

It really sucks to have to spend $40 to $80 on OEM float valves but the cost of performance...

If you hook up a hand vacuum/mityvac on pressure mode and find the bubbles are where the drain screw seats then take one of those pipe-cleaner-like things for cleaning welding tips. Then take the drain screw out and inspect. Usually, not always, cleaning the screw with a brass wire wheel and a new o-ring will put a stop to it. If that fails there are aftermarket drain screws however you may have to experiment. Sometimes the taper is too small and they don't work, other times they are OK.

If you're giving the carb the "full business" then separate the carbs, get new o rings from MCM for the crossover tubes and pilot mixture screws. Remove the air cut off valves and get aftermarket ones. Remove the rubber idle passage plugs and get aftermarket ones. Remove all rubbers then clean. Verify flow with carb cleaner. When reassembling carbs bench sync by setting the sync screw and turning the idle in it while watching the throttle plates. You will see the bypass port being exposed. Adjust until they are even to your eyes. It may not be dead on, but will be close if your bike is mechanically sound and will be enough to start the bike. I set the initial idle adjustment so the bypass port is about half exposed. You can set float height on the bench, but its better if the carb is upright. The 45 degree angle is harder and almost always being about 2 to 3mm off (usually too lean). When checking i like to do it by turning the petcock on for a trickle then push up the float slowly until it stops then check.

Make sure you're blowing passage ways and jets with compressed air then verifying flow with the carb or brake cleaner. Do it a few times. High e guitar string works well for cleaning the idle jet and its passageways. Dont use anything bigger as it may bore the jet out.
 
And good luck.

My main takeaway with the Keihin carbs is the only acceptable aftermarket parts are the diaphragms/air cut off valves/fuel accelerator, float bowl gaskets (K&L only, mystery brands swell really bad or don't fit), and idle passage plugs. Get o-rings from MCM. The ones in carb kits and harbor freight o-ring kits are usually not rated for fuel so they fail after a year or two. Never replace jets, jet needles, needle jets with aftermarket. OEM is mostly still available, but the main jet is still available as genuine keihin from jetsrus. If you have a botched idle jet PM me I have some I've extracted and cleaned from junk carbs I keep in stock. I also have used emulsion tubes I've extracted for the same reasons.
 
And good luck.

My main takeaway with the Keihin carbs is the only acceptable aftermarket parts are the diaphragms/air cut off valves/fuel accelerator, float bowl gaskets (K&L only, mystery brands swell really bad or don't fit), and idle passage plugs. Get o-rings from MCM. The ones in carb kits and harbor freight o-ring kits are usually not rated for fuel so they fail after a year or two. Never replace jets, jet needles, needle jets with aftermarket. OEM is mostly still available, but the main jet is still available as genuine keihin from jetsrus. If you have a botched idle jet PM me I have some I've extracted and cleaned from junk carbs I keep in stock. I also have used emulsion tubes I've extracted for the same reasons.


This fellow is at the early learning stage from what I have gathered and all the info provided by yourself and LDR should help him on his way. These carbs can be difficult and if not carefully done correctly you can be chasing your tail. At least they are a set and not a bank of four, so the re/re is much easier if needed.

Re the float bowl gaskets. Sirus Consolidated in Canada does sell a set of Viton float bowl gaskets for these carbs that they have had specially made in Viton.

 
6FBA9086-AAD8-4933-B6C8-7401F5706706.jpeg
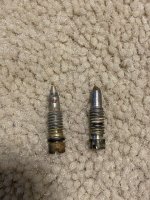
I think I have found the culprit. It was the drain screw after all, I noticed the screw was super corroded compared to the side that wasn’t leaking - even after sanding it down with 600 grit. I’ll still check the tube within the float bowel but have I think this might be the issue.


Looking into buying these as replacements, but very skeptical on buying aftermarket stuff after everything you guys have previously mentioned.
 
Last edited:
Your one screw is missing an O ring seal and the tip where some of the sealing is also done is broken or corroded. Since your in Canada you should be checking Sirius Consolidated or PartsNmore both in the SW Ontario area for parts. If you live in that area you maybe able to pick up the parts from one or both suppliers vs shipping costs. They sell in both US and Canadian $$ and are more local than 4 into 1 for shipping purposes.

They have the same parts in many cases imported from Taiwan or China as these US suppliers/
 
I think I have found the culprit. It was the float needle after all, I noticed the needle was super corroded compared to the side that wasn’t leaking - even after sanding it down with 600 grit. I’ll still check the tube within the float bowel but have I think this might be the issue.


Looking into buying these as replacements, but very skeptical on buying aftermarket stuff after everything you guys have previously mentioned.
Those screws will be fine but check Sirius 1st.
The O-ring on those screws is to keep crud out of the screw threads and to seal the bore when the screw is opened. They have zero effect on leaking.
 
Your one screw is missing an O ring seal and the tip where some of the sealing is also done is broken or corroded. Since your in Canada you should be checking Sirius Consolidated or PartsNmore both in the SW Ontario area for parts. If you live in that area you maybe able to pick up the parts from one or both suppliers vs shipping costs. They sell in both US and Canadian $$ and are more local than 4 into 1 for shipping purposes.

They have the same parts in many cases imported from Taiwan or China as these US suppliers/
Oh yes, I have removed that o ring before hand. It was not missing when I first removed it.

Oh thank you for reminding me on sirius, I’m checking both websites and they seem to be selling a screw set with the drain screws included which seems intriguing. Might go with partsnmore since its a bit cheaper but will probably decide later tonight. Only thing about both sets is that they are regular screws and not allen screws, and I was kind of preferring allen just because of not having to worry about stripping.
 
Last edited:
F71E730C-4EF7-4AA2-A530-CF169E2F6B5A.jpeg
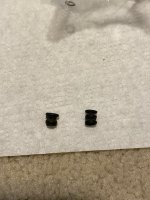
Hey so I found these two boots in my left over baggie. I think I know where the right one goes (accelerator pump boot), but not sure where the one on the left goes. Any ideas?
 
Both items are the same part, it's a rubber gaiter that has split in half. It protects the accelerator pump shaft from dirt entering the the lower assembly body. I assume you're talking about the screws for the carb bodies when you say allen bolts vs the JIS screws the factory uses. Be aware that the carb bodies are a delicate material and only a minimal amount of screw pressure is needed.
Many strip the float bowls by over tightening the screws! Allen bolts are the perfect product to apply too much force when putting things back together. Be aware the the screws from the Honda factory are a JIS standard and not a Philips screw head as most who are new to wrenching assume. The internal cross design is different inside the head and can be stripped easily in that cross section by using a Philips screwdriver rather than a proper JIS screwdriver.

JIS = Japanese Industry Standard
 
..and make sure to install that rubber boot gaiter into its hole in the carb body from the inside where the accel pump rod's diaphragm goes before installing pump rod, otherwise gravity and vibes slide it down the rod and away from the carb where it'll do nothing
 
..and make sure to install that rubber boot gaiter into its hole in the carb body from the inside where the accel pump rod's diaphragm goes before installing pump rod, otherwise gravity and vibes slide it down the rod and away from the carb where it'll do nothing
Rubber boot is useless it is split and will not stay in place or work correctly. Hopefully he bought a kit with a new accelerator pump set since the boots are not available as a separate purchase.
 
Last edited:
Rubber boot is useless it is split and will not stay in place or work correctly. Hopefully he bought a kit with a new accelerator pump set since the boots are not available as a separate purchase.
In the process of getting the replacement alongside new allen screws and drain screws 👍
 
The aftermarket slow jets will be fine.
The slow jet has a extremely small hole in the very center, .38mm or .015". They plug up easily and are a booger to clear.
75/105 was the original jetting size with a 110 being optional so you will be fine with a 75/110 combo. However you should use the original 75 jet at least. Kit jets are notorious for being over/under sized. We recommend to everyone to use the original brass when rebuilding any carb. New Keihin jets are available from Jets-R-Us https://www.jetsrus.com/a_jet_kit_street/honda_400_CM400_1980.html
STOP! trying to remove the emulsion tube. 1st shoot some penetrating oil into the hole and let it sit, PB Blaster or Kroil not WD40. While it soaks get a 4mm Allen head socket, 1/4 or 3/8 drive. Round of the 6 corners of the wrench with a file until it just fits the hole. I used my drill press to spin it while filing. Now make a straight blade screwdriver tip on the end that just fits, use one of the other jets to check. It's @1mm width. Once this is done the penetrating oil should have worked to some degree. Insert socket with ratchet and lean down hard on it so it can't slip and apply pressure, it'll break loose eventually. You may need to stop and resoak with penetrating oil for a day if it starts to feel like it's going to break.
Here's a picture of the tool
View attachment 22003 View attachment 22004


On a similar note, I am rebuilding a pair of vb22G's which have the idle air screw hole blocked (plugged) in the right carburetor. On these carbs, does one idle air screw set the mixtures for both carbs? Also, do I need to remove the blocking plug to clean the carbs? If so, how does it come out? Thanks, LDR!!
 
On a similar note, I am rebuilding a pair of vb22G's which have the idle air screw hole blocked (plugged) in the right carburetor. On these carbs, does one idle air screw set the mixtures for both carbs? Also, do I need to remove the blocking plug to clean the carbs? If so, how does it come out? Thanks, LDR!!
There is a mixture screw for each carb.
Not sure what you mean about a blocking plug. Picture will help me
 
Some clutz broke the mixture screw off, probably trying to remove the limiter cap. That needs to be removed and a new screw installed. The large plug next to it isn't touched.
 
It looks more like someone tried to remove the mixture screw in the past and the flat head portion broke off. You can probably extract it with an easy-out.
 
Correct me if I'm wrong, but how do I get the brass overflow tube out of the float bowl to sand it flat? Also with the carb towers in the way on the body, how to sand the surface there? Rotate by edges?
 
Correct me if I'm wrong, but how do I get the brass overflow tube out of the float bowl to sand it flat? Also with the carb towers in the way on the body, how to sand the surface there? Rotate by edges?
Don't worry about the float bowl gasket surface too much, the O-ring will seal.
 
Correct me if I'm wrong, but how do I get the brass overflow tube out of the float bowl to sand it flat? Also with the carb towers in the way on the body, how to sand the surface there? Rotate by edges?
They're not supposed to come out. Only sand them if leaking to look for a long split crack.
 
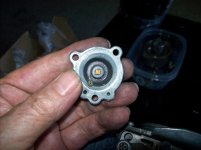
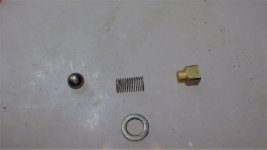
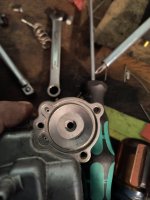
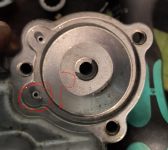
Jim, I got a fuel accel cover where the spring and ball bearing were floating around in there. Where exactly does it go?
 
The hole to the left or the brass slug? Because both brass slugs are there, which is why I'm confused to where it came from.
 
Looks like you found the source, cover missing pieces.
Use a small drill bit thru the bottom hole on the bowl to tap the check valve out to verify everything is there.
 
Back
Top Bottom