Tidying up my new to me CB450K5

There is one note I don't understand in the FSM...N O T E : (l) lt should be noted that the tensioner pushrod should not be pushed in with finger and the cam chain should not be tightened excessively. This shortens the chain service life and lessens the guide roller durability.
Adding more force to the adjustment puts more pressure on the cam chain and rollers than intended and will wear them out sooner. Let the spring inside the tensioner assembly put the correct amount of tension on the chain and lock it there.

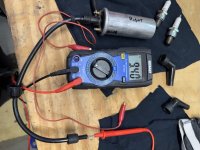
In case you aren't completely familiar with the design you're adjusting, this is what it looks like.

450 cam drive.jpg
 
I did not follow the "common" instructions on the inter webs.
It just dawned on me the reference you were making, and interestingly enough that is EXACTLY what their video doesn't explain, and what likely caused this guy to half destroy his top end because he did the same exact thing before his jumped cam timing and broke a follower.
 
Makes sense with that explanation. So when I tighten the bolt, is there a specific torque value or do I just use reasonable wrench tension?
Yes, just tighten the lock bolt using a good "feel" for the strength of a 6mm bolt (with 10mm head). Not sure how you'd get a torque wrench in there anyway.
 
Possible dumb question here...Is the gas feed from the tank to the carbs strictly gravity feed or do the carbs exert some vacuum to draw more fuel in as the throttle increases?

The reason I ask is that I replaced the fuel line to the left carb with a smaller ID than what came off and it seems like the left carb was starving for fuel. I have subsequently replaced it with what I think is the correct ID line, but I haven't been able to take the bike out to see if I'm having the same symptoms.

I've also checked the petcock and I don't see any signs of blockage.

Thanks in advance
Strictly gravity feed. OEM fuel line size is 5.5mm available from 4into1, but you have to buy 5 feet of it to get any since they stopped selling it by the foot.
 
With the proper size fuel line I'm still getting a lot of stumbling. It is on the left side. The bike will run real smooth for 5-6 miles, then it starts to stumble. It gets worse the more I ride. I've got clear fuel line on both carbs and they are both full of gas.

When I manually move the throttle on the left carb alone, it stumbles. When I do the same on the right carb, the rpms increase smoothly.

Any suggestions?
You might check how smoothly the slide lifts and drops in the top cover of the carb, that reaction is similar to when the CV carbs on a 350 or 360 have a bad diaphragm.
 
This is the problem. Logically, if you had to use a wrench to loosen the lock bolt, you can't finger tighten the lock bolt afterwards. While the overall instructions might not be spelled out exactly, the lock bolt is intended to lock down the tensioner push bar AFTER adjustment. If you only finger-tighten it, then lock it at THAT position with the lock nut, you've effectively left it with a lock bolt not locking it in position. The load on the cam chain to rotate the cams while opening valves causes the chain to push back against the tensioner roller and therefore the tensioner push bar, and the tensioner is being pushed backwards while the engine is running, effectively creating slack in the chain which is what you're hearing.

That's why it is so important to study the exploded views, and understand the working principle.

After making sure that the fuel-kok (to avoid the **** :ROFLMAO: ) is working properly (shutting-ff 100%), please empty your float chambers while riding the bike by shutting-off the fuel-kok 300 meters or a 1/4 mile before you reach your destination and let it run until the engine is cutting-off by itself. If you don't plan to run it for a longer time, open the choke a little by little to keep the engine going, until the choke is fully closed and the engine shuts down due to fuel starvation. After this, the bowls are empty, and the jets are bone dry.
 
Last edited:
You might check how smoothly the slide lifts and drops in the top cover of the carb, that reaction is similar to when the CV carbs on a 350 or 360 have a bad diaphragm.
The slide lifts and drops smoothly like it should. Of course I checked it while the engine is cold this morning. Not sure if it will be any different but I'll check it again after I warm up the engine later today.
 
I ran the bike this afternoon and same problem. I know the left carb is getting consistent gas. Again the bike ran fine for about 7-8 miles then the left cylinder started acting up. The slide in the carb operates smoothly with the engine hot too.

I pulled the plug and it was pretty black No oil or gas just a lot of carbon. I put another used plug in and ran it again. It still stumbled, but not as bad. At this point I'm thinking something electrical. I was reading a thread earlier about stumbling at higher rpms, I need to find it again and read it more carefully.

I'm still at a loss as to why it would run good for a few miles, then start stumbling?

Any thoughts?
 
Last edited:
Condenser that starts failing when it heats up or a bad bullet connector in the ignition circuit. Also check the points and connections there. Hunting a ghost.
 
Condenser that starts failing when it heats up or a bad bullet connector in the ignition circuit. Also check the points and connections there. Hunting a ghost.
Going through some different threads, looks like I should test coils, plug wire caps, condensers. The bike came with tytronic EI...need to do some research on that too. I think I read someplace that orange spark indicates a weak spark.

Spending most my life playing with oil hammers (diesels), all this sparky stuff is kinda foreign to me. Needless to say electrical is not my strong suit, looks like I'll be jumping into the deep end and learning to swim.
And I may have mentioned this before, but that Tytronic EI could be suspect in this situation, they seem to be known for a short-ish life.
 
A saying that keeps popping up here in the forum is that most carburetor problems are electrical has a lot of truth at least in my experience. I am using points ignition myself, using old points that came on the bike when I got it. I just dressed up the contacts but I bought new coils, condensers, caps and plugs because they were so old. Make sure you you are using resister caps with non resister plugs or vise versa. Also be suspicious of the plugs possibly being counterfeit, I threw away 8 new NGK 2411 B8ES plugs because they had super high resistance, 15-20 K and should have been close to 0. With that said I have only test run my engine briefly after a lot of work on the carbs so who know what I will find going forward. :unsure:
 
Yup you did. If that's the culprit, any recommendations on a quality EI?
Seems the consensus overall is the Charlie's Place EI, though (it seems) he insists that his coils be used with it too though you'd have to check with Charlie. Most of the EIs are just "points replacements" in that they use the stock centrifugal advancer unit, no electronic advance. But they do save the points adjustments every few thousand miles.
 
Robman, LDR, Gary, Ancientdad...thanks for all the input. I think my path to diagnosing the problem is becoming ever clearer.

I found an interesting thread about Tytronic EI's exhibiting the exact same left cylinder problem I'm having. I thought I got myself a freebee...still gonna check everything else before, to rule out other possible failure points.
 
Robman, LDR, Gary, Ancientdad...thanks for all the input. I think my path to diagnosing the problem is becoming ever clearer.

I found an interesting thread about Tytronic EI's exhibiting the exact same left cylinder problem I'm having. The date code on my Tytronic is 07/2016. And yes the Euro one is quite pricey.

 
Last edited:
If you still have the points plate/points, you could always reinstall that and see if the problem disappears. If it does, great - ride away and decide if you want to swap out for an electronic points version like Charlie's (which runs just fine on regular coils, just FYI).
 
If you still have the points plate/points, you could always reinstall that and see if the problem disappears. If it does, great - ride away and decide if you want to swap out for an electronic points version like Charlie's (which runs just fine on regular coils, just FYI).
I wish I did. I purchased the bike with the EI already installed. That would take one variable out of the equation.
 
I had just a few minutes now so I pulled the plugs caps off the wires and measured resistance.

Left cap = no reading
Right cap = 10.5k ohms
 
I had just a few minutes now so I pulled the plugs caps off the wires and measured resistance.

Left cap = no reading
Right cap = 10.5k ohms
10.5k on the right cap is too high in itself, but the no reading on the left seems off. Are you sure it's zero, as in no resistance at all (non-resistor cap), or infinity?
 
10.5k on the right cap is too high in itself, but the no reading on the left seems off. Are you sure it's zero, as in no resistance at all (non-resistor cap), or infinity?
The ohm meter reads "O.L". Like when you're not touching anything. Those should be reading around 5k, right?
 
Last edited:
The ohm meter reads "O.L". Like when you're not touching anything. Those should be reading around 5k, right?
Correct. If it’s OL, then the wire and/or cap are no good.

Usually, this just means snipping the wire back 1/4” at each end to get some clean core, then twist it back on and check again. Test the cap independent of the wire while you have it apart. That should by 5K ohm by itself.
 
Briefly looked over the thread so sorry if I missed it but what plugs are you running? As I am sure you know you don't want resister caps with resister plugs, but you can mix either way, i.e. resister cap and non resister plugs or the other way around.
 
And I just went back over the thread too, looking to see if the coils were mentioned. Might be time to ohm them out as well.
 
Will check everything else before I order parts. It would be nice if this is the cause of my left cylinder misfiring.
With an OL reading on the left plug it’s a virtual guarantee there’s no way to get spark there.
 
With an OL reading on the left plug it’s a virtual guarantee there’s no way to get spark there.
There was a very tiny orange spark. It was very weak. It would run on Both cylinders for a few miles, then the left cylinder would sputter and mis-fire. That's what started this whole exercise.

And I just went back over the thread too, looking to see if the coils were mentioned. Might be time to ohm them out as well.
That's on my to-do list. Along with checking all bullet connectors and grounds.

Briefly looked over the thread so sorry if I missed it but what plugs are you running? As I am sure you know you don't want resister caps with resister plugs, but you can mix either way, i.e. resister cap and non resister plugs or the other way around.
They were mismatched. The left cylinder was running a B8ES and the right was running a B7ES. I have a set of BR8ES on order. I'm assuming the "R" means resister type.

I did read about the resister/non resister match so I need to get non resister caps...right? Would it be better to go the other way around or does it matter?

I'm working on a steep learning curve right now. You all don't know how much I appreciate your input fellas, like I said I spent decades playing with oil hammers, so I'm trying to come up to speed on all things sparky ;). I'll be tearing into it more on Friday.

I also noticed today that there's no selenium rectifier where it should be, so I assume there's a combo unit that's located under the intake crossover.
 
Last edited:
They were mismatched. The left cylinder was running a B8ES and the right was running a B7ES. I have a set of BR8ES on order. I'm assuming the "R" means resister type.

I did read about the resister/non resister match so I need to get non resister caps...right? Would it be better to go the other way around or does it matter?
My understanding is it doesn't matter as long as one is the resister type and the other is not so you need to be sure to order non resister caps. Be sure to test them when they come in to make sure there was no defects or worse counterfeit parts. Who are you ordering parts if you don't mind mind my asking?
 
My understanding is it doesn't matter as long as one is the resister type and the other is not so you need to be sure to order non resister caps. Be sure to test them when they come in to make sure there was no defects or worse counterfeit parts. Who are you ordering parts if you don't mind mind my asking?
I was thinking about ordering a them from 4into1. Any suggestions? How do you tell if they are counterfeit? How do you test non resistor caps?
 
I was thinking about ordering a them from 4into1. Any suggestions? How do you tell if they are counterfeit? How do you test non resistor caps?
4into1 should be fine but a quick search didn't show any non resistor caps so you may want to contact them before you place the order to make sure they have them. I believe I got my caps from them but they are resistor and I ended up ordering Denso non resistor plugs. If you are order from a reputable vendor then you shouldn't have issues with counterfeit parts and to test a non resistor cap should ohm out at or close to zero like a straight piece of copper wire. The new plugs should be at 5K ohms.
 
With an OL reading on the left plug it’s a virtual guarantee there’s no way to get spark there.

Not entirely true, since the high voltage can "jump" in the spark plug cap, searching for "lower ground". But this "jumping" will be intermittent at best, not following the orders from above. Spark plug caps are relatively cheap, I replace them standard every 7500 km or every 5 years, what comes first.
 
4into1 should be fine but a quick search didn't show any non resistor caps so you may want to contact them before you place the order to make sure they have them. I believe I got my caps from them but they are resistor and I ended up ordering Denso non resistor plugs. If you are order from a reputable vendor then you shouldn't have issues with counterfeit parts and to test a non resistor cap should ohm out at or close to zero like a straight piece of copper wire. The new plugs should be at 5K ohms.
Which Denso non resister plugs are you running?
 
So here's the results of the testing on the coils. Do these look original? (Note: the jumper wires only added .1 ohm)

Right primary
Right primary.JPG

Right secondary
Right secondary.JPG

Right secondary with plug wire
R. secondary w:wire.JPG

Left primary
Left primary.JPG

Left secondary
Left secondry.JPG

Left secondary with plug wire
Left secondary w:plug wire.JPG
 

Attachments

  • L secondary w:wire.JPG
    L secondary w:wire.JPG
    147.7 KB · Views: 5
  • Left secondary w:plug wire.JPG
    Left secondary w:plug wire.JPG
    380.3 KB · Views: 0
Last edited:
Nope, definitely not original. I'd like to see how they mounted them because it might have an effect on replacing them with factory-style coils. If the original mount in intact, you should make it easy for yourself and buy a pair of these.

 
Nope, definitely not original. I'd like to see how they mounted them because it might have an effect on replacing them with factory-style coils. If the original mount in intact, you should make it easy for yourself and buy a pair of these.

Here's how they're mounted. Looks like they are connected to the original mount
Mount.JPG

Coil mount.JPG
 
Back
Top Bottom