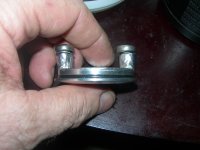
I have a Pamco Ignition. Made by a grumpy old man (Pete) in South Carolina. He retired from doing these in 2019. I helped him develop the product (Testing, installation- I wrote up install instructions and did a schematic) for the CB360. So it is no longer available, but was a decent product. The Pamco unit has pre-programmed advance, so no mechanical advance. Full advance is at 3500 RPM.
Back when I was doing this (about 2013), There were a couple of choices. The ones that used the mechanical advance suffered from the same fate, our old bikes that have worn out parts. A good electronic ignition with mechanical advance has issues if the advance assembly is worn, the springs may have lost there tension, the advance mechanism can bounce. The points actually stabilize/dampen the point cam, so removing the points allows the points cam to bounce around a little more than it did with the points on. The electronic systems with mechanical advance can be good, but only if your old mechanical advancer is is good shape.
So I went with the Pamco Unit because it is non-mechanical on the advance. I am using the OEM coils, Replacement spark plug caps with no resistor, and resistor plugs (NGK Iridiums). I have not touched the system in over 10 years and have had no ignition issues at all. Even when the gas is stale, the bike fires up quickly.
I have not researched what's available now, but options have never been great for our CB360's. If my Pamco fails, I will probably go back to points, but may look at what is available.