1967 CB160

daveythewavey19

Well-known Member
Joined
Sep 20, 2020
Total Posts
88
Total likes
28
Location
Dublin, NH
Hello everyone! I haven't been visited the forum for a while, but now I have a new project so it's time to start posting again:

rotate.jpg rotate2.jpg

The bike is a 1967 cb160 I found on Facebook Market Place from a nearby seller. The price seemed fairly reasonable and I've wanted another project for a while. I kind of feel like this one is a little too nice compared to what I started with for my last project. This one actually runs nicely and is cosmetically pretty good. I could probably get away with just doing the brakes and getting new tires it would be ok for the street. But I think I'm going to strip it down totally and refresh all the consumables, repaint the frame, fenders, engine and side covers, polish the aluminum parts, etc. I may leave the engine internals alone though. It starts easily and seems to run really nicely so I don't see a reason to open the engine.

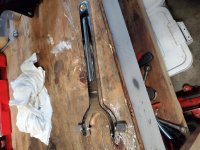
I didn't know when I bought it but after I paid for it the seller said, "Oh this comes with it," :

rotate3.jpg

Another 160, pretty complete too. A nice surprise and I'd never turn away free parts!

So now the 69 cb175 has a friend and I have my next project. I'm looking forward to getting started.

rotate4.jpg

Thanks for reading!
 
Last edited by a moderator:
I started doing some stripping of paint and a little repainting. I have the toolbox, taillight bracket, and chain guard repainted:

black parts.jpg

I've learned since my last build that using an angle grinder with a wire brush works OK to remove paint but is too dangerous. So this time I'm using a buffing motor with a brass brush after paint stripper and power washer:

20230604_180303.jpg 20230604_180300.jpg

Next I'm going to strip the headlight bucket. I'm not sure how to get the instrument cluster out yet...seems like you just kind of pry it out with the rubber piece but I don't want to break it. Rubber is still fairly flexible. Need to look into the proper way to do it.

20230603_170420.jpg 20230603_170426.jpg
 
Yeah, I would avoid tearing that rubber cush ring, they are no longer available. At the minimum I would squirt a bit of WD40 along and around the edge to loosen it before popping it out. IIRC the speedo comes out before you remove the rubber from the bucket. I would remove those spring nuts from the back of the speedo to help get the speedo out.

I still can't believe you got a two for one. They are very unique models and have parts that are very hard to find in many cases, so take your time and don't throw anything away.
 
Your complete bike is not really a 67 if those are the original forks, although it may be titled as such. It appears to be a 65, as is mine. It does have a CL, not CB front fender and the levers have mirror bosses, which the early (65) do not have.

Petcocks and rear brake cables are difficult/impossible to find. Don't mess up those chrome fork seal holders either. I made special wood blocks to remove mine for cleaning and refilling fork oil and did not need to replace the seals, again NLA.

There at least two build threads here that I know of, My own and Alan's 'Black Friday...' thread.
CB160 Blue on White maybe (vintagehondatwins.com)
 
Thanks for the info! Yea I'm aware of the CL fender, the guy that sold it to me said that. I believe the second bike was a CL and the guy before me harvested some stuff from it to make this bike complete. My impression so far working on this bike is that it seems like more care was taken with the design vs my 69 cb175. Not that it was hard to work on that bike but seems like this one has better materials (almost every part is metal) and the design just seems simpler in the best of ways.
 
Back in 65, craftsmanship seemed more important than production efficiency, IMO. The CL's also had side stands but no center stand, which I miss.
 
I have most of the painting I want to do finished now. I still need to paint the engine covers and the front fender. I think I will look for the correct front fender on eBay instead of using the CL fender that came with the bike. The bottoms of the forks could be painted but they are pretty good the way they are so I haven't decided yet on those. The tank is in pretty good shape and I don't think I'm going to mess with it. I rebuilt the petcock the other day and cleaned it up so it's shiny. I think my next job will be putting the new steering bearing in; I'm using the All-Balls captive roller bearing kit which I've used before and liked it. Also ordered some new electrical parts. The original rectifier and coils worked fine but I'm going to replace the old style rectifier with the regulator/rectifier combo and replace the coils and capacitor anyway.

20230704_181253.jpg 20230712_190910.jpg
 
Last edited by a moderator:
I'm having some trouble installing the replacement steering bearing kit. The top race seems to protrude above the frame too much and the bottom race doesn't even begin to fit. I'm wondering if the kit was put together with the wrong parts, comparing the old race with the new one, the new one is about 5mm wider. Last time I used this brand I didn't have any issues with fitment. Time to try another brand I guess.
 
I'm having some trouble installing the replacement steering bearing kit. The top race seems to protrude above the frame too much and the bottom race doesn't even begin to fit. I'm wondering if the kit was put together with the wrong parts, comparing the old race with the new one, the new one is about 5mm wider. Last time I used this brand I didn't have any issues with fitment. Time to try another brand I guess.

Some tapered races will stick up out of the neck a bit, but of course the lower race should fit properly. Did you buy the bearings directly from AllBalls or a reseller?
 
Bought from 4-into-1. Last time I bought from them I had no problem. The package was labeled correctly but I'm guessing whoever put the kit together screwed up. The bottom race diameter was way too big. I ordered another set from Boss Bearings and those worked without a problem:

aa.jpg

I also found a CB fender on eBay to replace the CL fender the bike came with:

asdrew.jpg

Working on stripping the paint and removing the dents now.
 
I started disassembling the forks and had a heck of a time getting them apart. First I had to unscrew the chrome covers from the fork body. I tried to do it without the correct tool but it was impossible so I bought the correct tool:

20230728_164108.jpg

$75 for this tool, kind of expensive but necessary. It would have been impossible to get the covers off without it. Glad I did because the insides were absolutely rusted to heck:

20230728_210646.jpg

One of them was so bad that a few holes opened up after I wire brushed the insides. Getting the old seals out was even worse, the old style seals for this bike are the ones with the metal outer casing that holds the rubber seal. They were absolutely frozen solid to the covers with rust. I used PB blaster and heat and eventually I was able to tap them out using a punch. The metal rings that hold the seals were very banged up in the process and they're very pitted too. I'm not certain if the replacement seals I ordered require the reuse of the metal rings or not. I've read a blog where one guy machine new metal holders for the seals because he couldn't get a hold of original style seals. I'll have to wait and see how tightly the new seals fit to determine whether the metal rings will have to be reused or not.

I cleaned everything up once I got everything apart:

20230730_180131.jpg

I stripped the paint off the fork bodies and I'm repainting them now. I also noticed that the fork tubes are slightly bent, one very mildly, the other more noticeably. I made two holders for the tubes out of a piece of 2x4 and I'm planning to remove the bends with a soft dead-blow hammer. I plan to lay the tubes in the holders with the bend facing upwards and giving a good smack with the hammer, check the bend, reposition, smack again, repeat until reasonably straight. I've seen people use a hydraulic press to do this but I'm hoping I can impart enough force with a hammer that this will work. We will find out.
 

Attachments

  • 20230728_164108.jpg
    20230728_164108.jpg
    164.6 KB · Views: 15
I'm hoping you'll be able to deliver enough force, but I'm honestly doubtful you will. My auto body repair father used a press to straighten many sets of forks, some on bikes I rode for quite a while after being bought wrecked, and he usually had to bend the forks significantly past straight (the opposite direction) in order to get them straight as they would spring back.
 
I haven't attempted straighten the forks yet, but I did finish stripping and repainting the fork bodies:

20230804_153436.jpg

For the black parts of the bike (which is everything except the engine, side covers, and fenders) I've been using VHT roll-bar and chassis paint and then 2k clear on top. Looks a lot better than what I used on my last project. I've gotten all the paint stripped of the front fender I got off eBay and roughed out the dents. My tools for getting the dents out are improvised but seem to work pretty well. I used a tow ball from a trailer hitch as a mandrel and a raw hide mallet. The fenders are not thick metal so banging out the dents is fairly easy.

To do the fine work, I'm using a technique I used when I was a musical instrument repairman. If you need to form some piece of metal to a specific curve, you can create a custom mandrel for that curve by pressing it into two part epoxy putty. When the putty hardens, you have an exact match for the curve you are trying to replicate. In this case, I have a dented and somewhat miss-shaped fender. However, some sections of the fender are still good and retain the original shape with no dents. So I grease up a good section of the inner part of the fender, make a big ball of putty, then press it against the fender. The grease keeps the putty from adhering to the metal:

20230804_173631.jpg

Once the putty hardens, I remove it from the fender and sand any imperfections out of the side that was pressed against the fender:

20230804_181230.jpg

Now I have a mandrel that exactly fits the work piece. The cured putty is more than strong enough to use as a form for removing the dents from thin metal like these old fenders.
 
Excellent work and techniques! I really like the ball hitch, good thinking. Casting a mandrel or even a mold is great. With a long trough and high strength mortar and a layer of food service thin plastic wrap we could make our own muffler skin molds.

Instrument repairman ingenuity (y)


Now, if you can find a jacked up car or truck wheel (to apply force), a few bricks or blocks and a nice pool table to roll those fork legs on to check deviation, you're set. Of course, an actual hydraulic press and dial indicators would be nice.
 
I've got a ~12" length of 2x4 somewhere in storage with my shop stuff that has 2 sealed skateboard bearings about 1/8" apart at each end, spaced from the surface with washers and fastened to the 2x4 with drywall screws.
I use it for checking fork tubes for bends, just place it on the bench and place a fork tube on the 4 bearings and give it a roll. It works similar to a v-block I guess.
 
Like ancientdad predicted, hammering by hand on the bent fork did not move it even slightly. After that I tried making a makeshift bender by attaching two u-bolts to the bottom frame of my junky Harbor Freight motorcycle jack and putting the tubes through the platform that lifts up so it would push them against the u-bolts when the jack was operated. The jack was able to impart a good deal of force but nowhere near enough to budge the bends. I think I'm just going to buy a shop press and get it over with. That said, it won't be for a while because I'm moving back to my hometown in New Jersey soon and we will be living at my parents condo until we find a new house down there. There's no room there for a shop so for the time being, I'll have to put this project on hold. Next house I get, garage space is going to be high on my list of things I have to have. I'm hoping I can find one of those houses where they already have a car lift installed in an out building or something. That's my dream.
 
So I am finally in a new house, back in New Hampshire again after living in New Jersey for about a year and a half with my parents. I have mixed feelings about coming back up here but I guess I never feel like I'm in the right place no matter where I am. Anyway, now that I have a garage and setup all my tools, I have started working on this project again. I have a shop press and I attempted to straighten the bent forks which I struggled with about 2 years ago. I was able to bend the forks with a shop press but unfortunately, the way I did it was starting to cause deformation where the forks were going out of round. So I gave up on that method and just found some used forks on eBay that were in reasonable condition. I've now rebuilt the forks with new seals:

20250718_180005.jpg
I've started disassembling and cleaning the wheels now. I'm using a steel wire wheel on a buffing motor to clean rust and that other gunk off the spokes and then shine them up with a brass wire wheel. Real brass wire wheels (not those harbor freight bras coated ones) are pretty expensive, like $80 each but they don't dig into the base metal so they are nice for cleaning soft metal. For the wheel hubs I'm using the brass brush but then those red 3M wheels. They work really nicely for removing all that aluminum oxide that builds up and they make a nice shiny finish. Only downside is they make a huge mess and don't last all that long. On my CB175 I did a few years ago, I used buffing compound to make the aluminum really shiny and then sprayed some clear coat or something (don't really remember) to keep them from oxidizing. That worked pretty well as the parts are still shiny. For this project, I don't think I will use buffing compound and use the 3M wheels instead. The finish they leave looks more "factory" to me whereas the buffing is overly shinny. My goal with this project is to try and return the bike to a more original look than my last project where my goal was to take a $400 rust pile and make it look OK and run well. I don't expect this to come out perfect because I just don't have that kind of money or facility to do that kind of restoration but I am hoping to have this looking refreshed and clean where a casual observer would think it's originalish.
 
Congrats on the new shop/garage, mucho better than the tarp tent.
Glad you got over the fork hurdle. I guess the spare bike forks didn't help out.
Lookin good, will be a roller soon.
 
I took the wheels apart and spent some time cleaning the spokes and hubs. Replaced the bearings on the front wheel, still need to do the back. I cleaned the spokes using a steel wire wheel, followed by a real brass (not brass coated steel) wire wheel on my buffing motor. This cleaned the front set up nicely but when I got to the back set, I had a snapped spoke and a few that were bent (not by me). I decided to just go ahead and buy a new set for the front and rear from David Silver Spares. I used those red 3M Scotch Brite on the buffing motor to clean up the wheel hubs. I like using those a lot better than regular buffing wheels and compound which is what I used on my last project. All though the traditional buffing compounds worked, the mess is ridiculous in a non-dedicated buffing room. Also, I prefer the matte finish look compared to the mirror finish I did with the traditional buffing. It looks more factory to me but since I was not around when these things were new, I have no idea.

Anyway, what I noticed is the hubs seemed to have a clear coat on them before I polished them. I'm assuming that's how the factory did it. I'm wondering if I should spray some clear coat on them again now that the aluminum is clean? What have others done? On my other project I did add clear coat but those were brought more to a mirror finish before hand. If I don't clear coat them, I'm concerned about how fast they will oxidize...but I'm not sure. Thoughts?

20250826_183923.jpg
 
I nylon bristle brush wheel the center ribs and clear them only, with VHT caliper clear. Polish the outer shiny parts.

 
I've got the wheels laced up now, took longer than I expected but not as bad as the first time I tried doing it on my other bike. Next job will be truing them. First I need to find one of the metal cones that holds the wheel on the stand. It went missing and I have no idea where the heck that thing went.

20250928_171126a.jpg
 
I took the wheels apart and spent some time cleaning the spokes and hubs. Replaced the bearings on the front wheel, still need to do the back. I cleaned the spokes using a steel wire wheel, followed by a real brass (not brass coated steel) wire wheel on my buffing motor. This cleaned the front set up nicely but when I got to the back set, I had a snapped spoke and a few that were bent (not by me). I decided to just go ahead and buy a new set for the front and rear from David Silver Spares. I used those red 3M Scotch Brite on the buffing motor to clean up the wheel hubs. I like using those a lot better than regular buffing wheels and compound which is what I used on my last project. All though the traditional buffing compounds worked, the mess is ridiculous in a non-dedicated buffing room. Also, I prefer the matte finish look compared to the mirror finish I did with the traditional buffing. It looks more factory to me but since I was not around when these things were new, I have no idea.

Anyway, what I noticed is the hubs seemed to have a clear coat on them before I polished them. I'm assuming that's how the factory did it. I'm wondering if I should spray some clear coat on them again now that the aluminum is clean? What have others done? On my other project I did add clear coat but those were brought more to a mirror finish before hand. If I don't clear coat them, I'm concerned about how fast they will oxidize...but I'm not sure. Thoughts?
I think the finish looks great. I've thought about a 3M wheel for the buffer, sounds good. Got a pic of it? I've got a front with deeper pits under the old clear than I thought. I've been wet sanding with some course foam sanding blocks, but it's too much to get them to disappear. I may opt for a fine brushed like yours. Anything is better than the splotchy grey and pitting under the old clear coat. I do like a mirror on that curved front hub but I may give up.
I've only sprayed the centers, between the spoke flanges and ribs with the VHT caliper clear so I can just hose them off later. Ancientdad likes to just wipe up the mirror finish surfaces and he's right, it's not bad if a mirror. Between the spokes after it's built, forget it, for me.
 
I found a set of
Varying grit fine nylon bristle drill brushes the worked good to burn through old clear on complex curved areas of side covers or brake platesIMG_1625.jpeg
 
Is there an opportunity to discuss that rear wheel assembly off the parts bike as a for sale candidate? I am restoring a 1966 CL160 for a friend and it has quite a few deficiencies in certain parts. I do need possibly a complete rear wheel it appears.
You can PM me or respond to the inquiry here.

I like the buffing on the hubs you have done, as it does look more stock than the highly polished ones do. Nice work on the build and stripping it down. It is good to see the bike get a clean refresh.
 
Last edited:
Nice. A symmetrical spoke pattern does take longer, you are one of the few.
I feel like they wouldn't really fit right if I did it another way so I wasn't doing it intentionally. I know there's more than one way to do it but I just sort of did it so it would end up with the outer spokes falling into the little groves the old spokes had dug into the hubs. If I didn't you'd see the little gouges the old spokes made which I wouldn't like.
I think the finish looks great. I've thought about a 3M wheel for the buffer, sounds good. Got a pic of it? I've got a front with deeper pits under the old clear than I thought. I've been wet sanding with some course foam sanding blocks, but it's too much to get them to disappear. I may opt for a fine brushed like yours. Anything is better than the splotchy grey and pitting under the old clear coat. I do like a mirror on that curved front hub but I may give up.
I've only sprayed the centers, between the spoke flanges and ribs with the VHT caliper clear so I can just hose them off later. Ancientdad likes to just wipe up the mirror finish surfaces and he's right, it's not bad if a mirror. Between the spokes after it's built, forget it, for me.
These are the pads I used:

Cubitron Scotch-Brite High Strength Disc

They will cut through the clear coat and will give you a pretty nice finish. They do shed a lot if you catch sharp edges. Best to stack up a few of them together on a buffing motor. I've done the mirror finish on aluminum before using traditional buffing wheels and compound but it's a huge mess and leaves a lot of buffing compound on the work piece that you need to make sure is totally off before spraying any clear coat on it.
 
Is there an opportunity to discuss that rear wheel assembly off the parts bike as a for sale candidate? I am restoring a 1966 CL160 for a friend and it has quite a few deficiencies in certain parts. I do need possibly a complete rear wheel it appears.
You can PM me or respond to the inquiry here.

I like the buffing on the hubs you have done, as it does look more stock than the highly polished ones do. Nice work on the build and stripping it down. It is good to see the bike get a clean refresh.
Sorry, I don't have the parts bike anymore. I sold it before I moved
 
Sorry, I don't have the parts bike anymore. I sold it before I moved
Thank you for the response and keep up the good work. I have a few people on the forum looking out for parts for me. I will update what I still need in a separate CL160 post on here. I have a US Shipping address in Niagara Falls NY, so no need to ship to Canada. If you do happen to come across the missing pieces I need, since they are very hard to find in Canada.
 
I've been working on my 1967 (I think) CB160, but I am neither as skilled nor as well-equipped as you are, and after spending the entire summer just disassembling, cleaning, and painting, I decided that I must get the bike running first so I can test it out before winter sets in. Your efforts both inspire and depress me -- they show how much better one can do, and how much worse a job I'm doing. {sigh}. But I've learned from closely reading your reports. Thanks much!
 
These are the pads I used:
I got a cheaper (under $20) 4 pack coming today. Thanks for the idea and link.
I've been working on my 1967 (I think) CB160, but I am neither as skilled nor as well-equipped as you are, and after spending the entire summer just disassembling, cleaning, and painting, I decided that I must get the bike running first so I can test it out before winter sets in. Your efforts both inspire and depress me -- they show how much better one can do, and how much worse a job I'm doing. {sigh}. But I've learned from closely reading your reports. Thanks much!
Hang in there Chris. I still feel like a beginner after 4 years here. Many lurk before they leap, smart.
 
It's been a while. Recently brought my wheels to a local shop to have tires put on and for them to check the wheels after I put them together. They said I did an OK job on the wheels but I over-tightened the spokes. So I'm glad I had them go over the wheels for me. As for tires, the put on vintage style ones that are thin. I think they look nice.

20260404_145703.jpg
 
I'm starting to put it back together now, put the center stand and front shocks on the frame today. Need to order some consumables and I think I will buy some reproduction plastic covers for the rear shocks. Ones I have are all scratched and scuffed up. I'd like to find complete reproduction rear shock assemblies. Not sure what's out there.

resizeaaa.jpg
 
Back
Top Bottom